A Deep Dive into the Giving Section
A friendly heads-up
This article showcases some features available only for those subscribed to our all-in-one software solution, Flocknote Complete, and/or those using our secure payment processing for church fundraising & giving. Learn more about these powerful tools here!
Still on our Classic Giving? View that HERE.
Welcome to the financial powerhouse of your network, the Giving section, where you can see the impact your Church is making to raise funds that build active, thriving communities! In this guide, we will review the resources available in each of the tabs shown below.
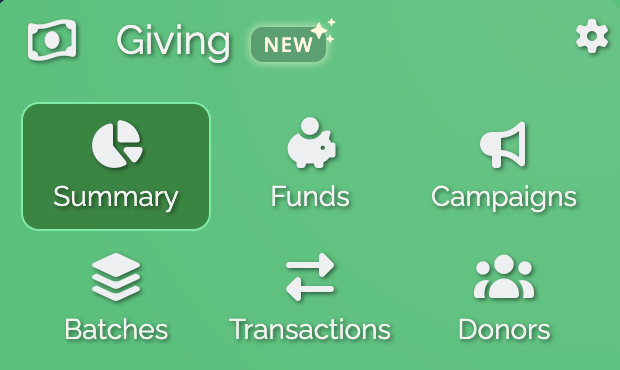
Summary
This page is a one-stop shop for giving! This page helps you understand your generous donors and your church's progress toward its financial goals.
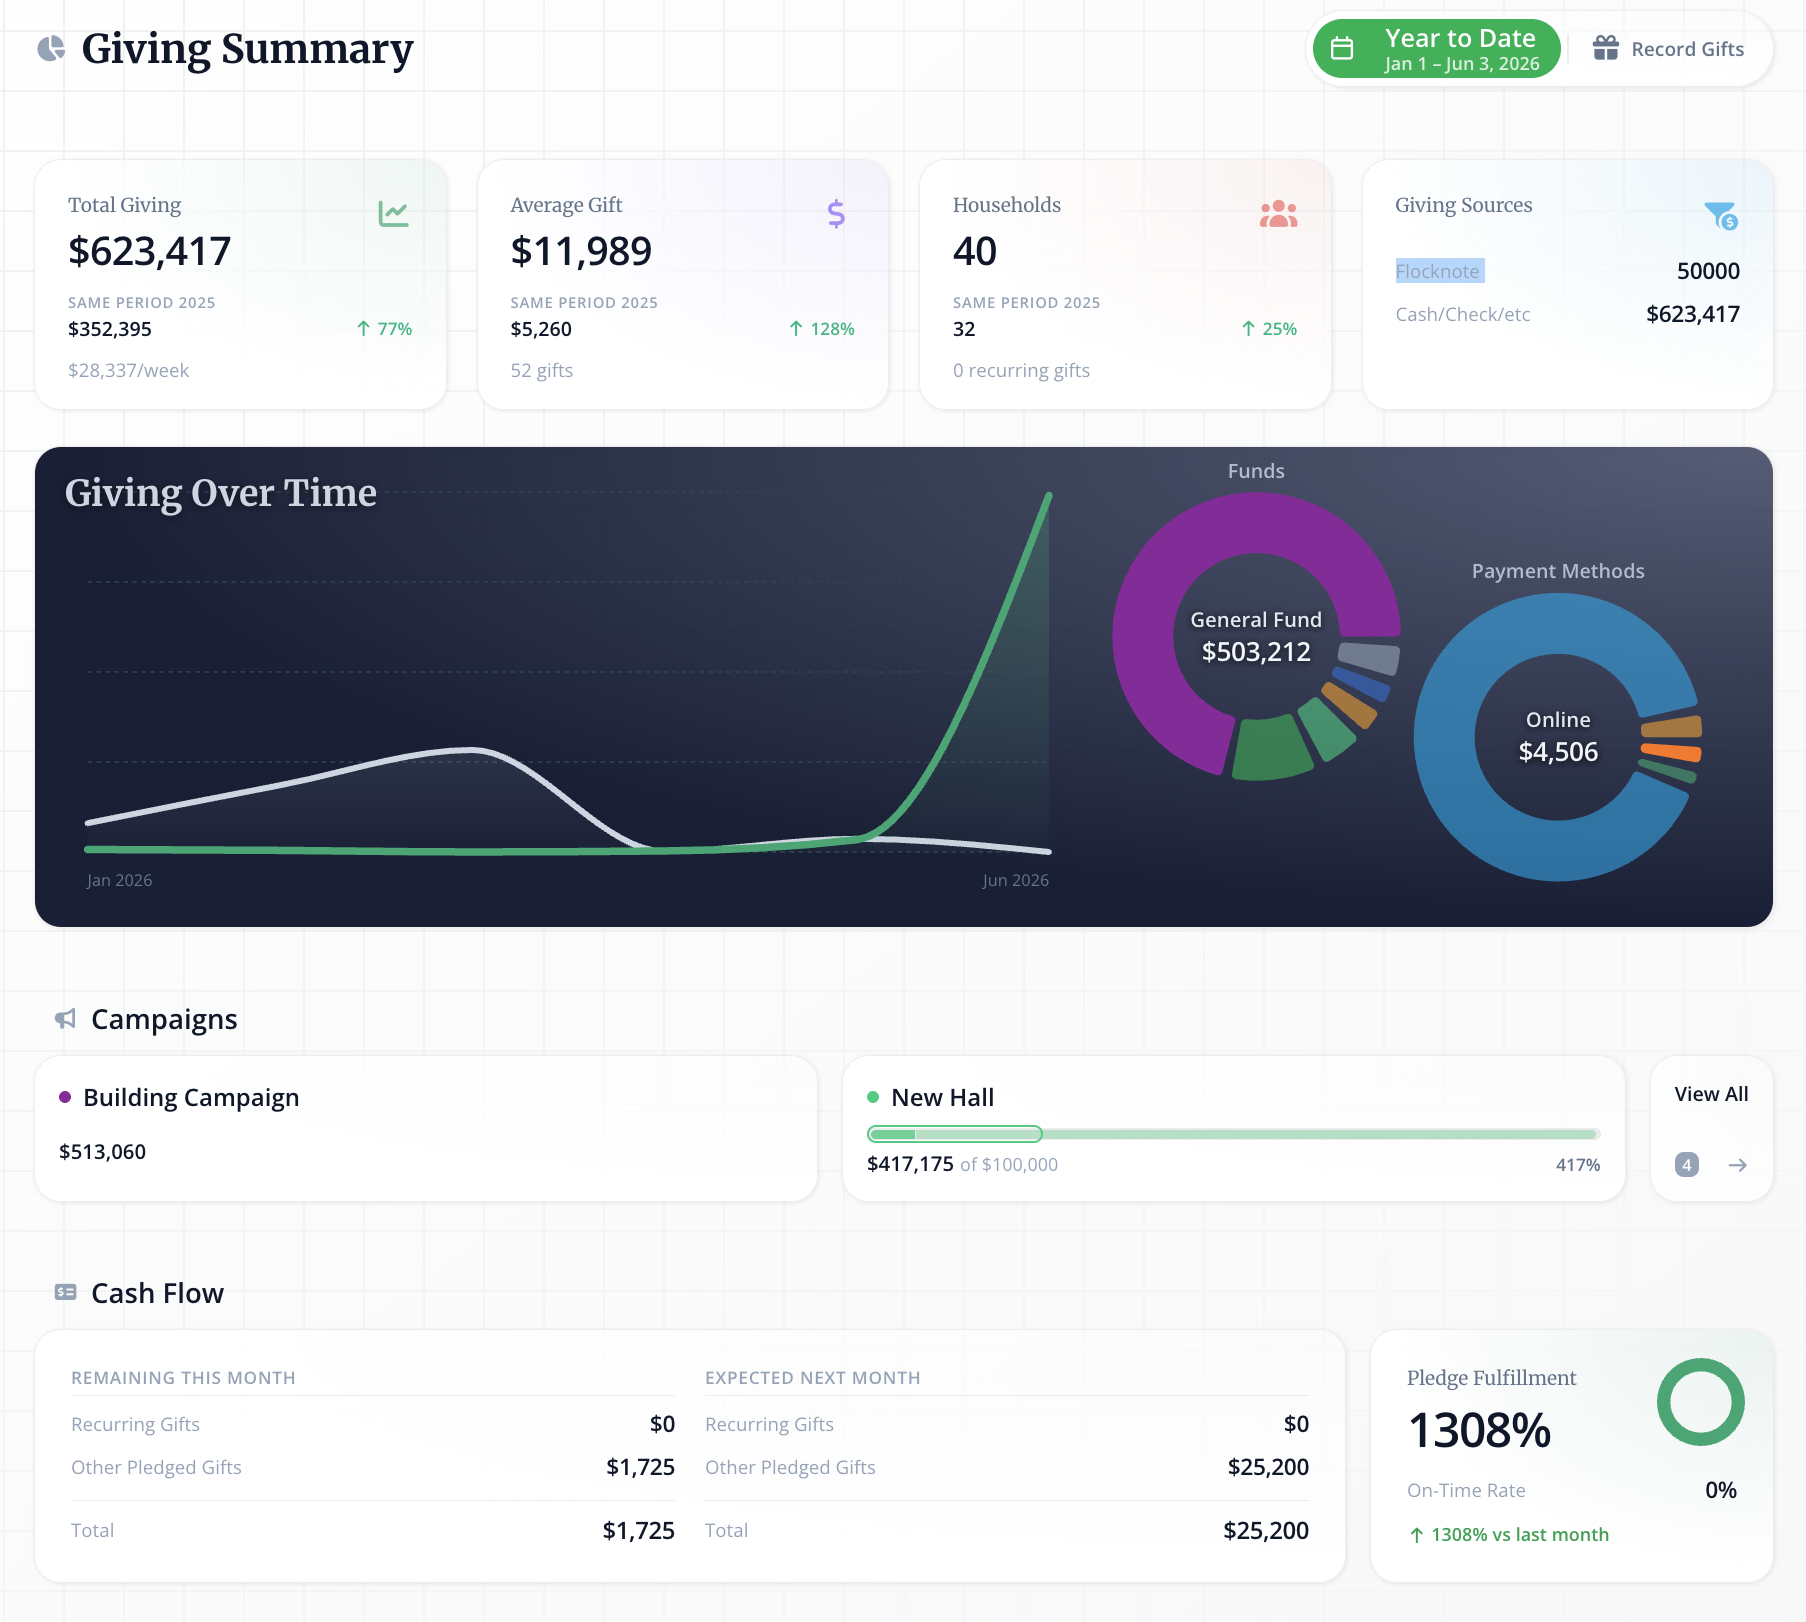
High-Level Statistics
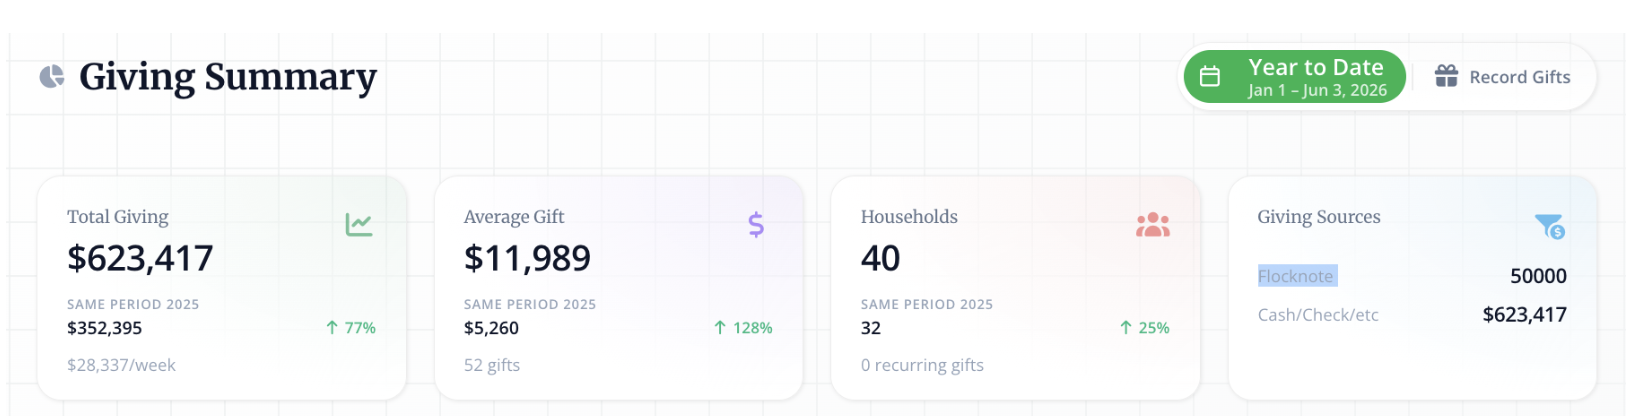
- Total Giving - Adjust the date in the top right-hand corner to see your total giving during that time period. Compare those time periods, giving the total to the total in the same period the year before.
- Average Gift - See the average gift during a particular time period, as well as the same time period the year before.
- Households - See the number of households that have given in that time period and the same time period the year before.
- Giving Source - Do the majority of your donors give by check, credit card, etc.? No, you can see how your donors are making their donations to the community.
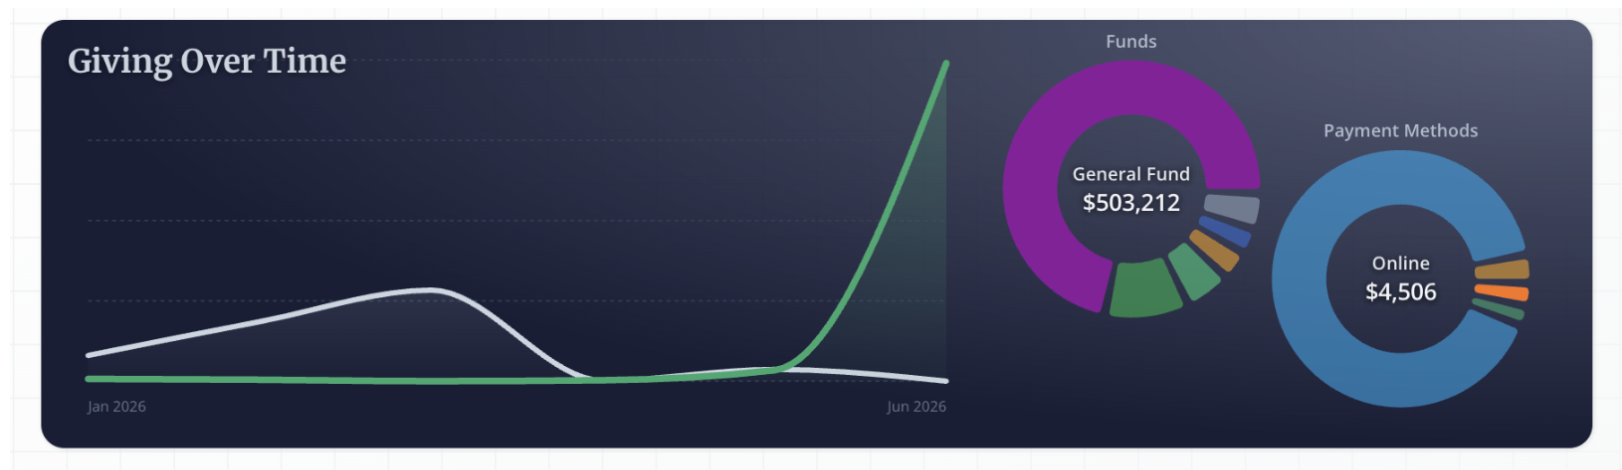
Giving Over Time
We've also included a few helpful charts to help you see your donations increase over time. Also see the breakdown of donations to particular funds or payment methods.
Campaign Summaries, Cash Flow, and Pledge Fulfillment
From the summary page, see your campaign progress at a glance. Click View All to hop over to the dedicated Campaigns page.

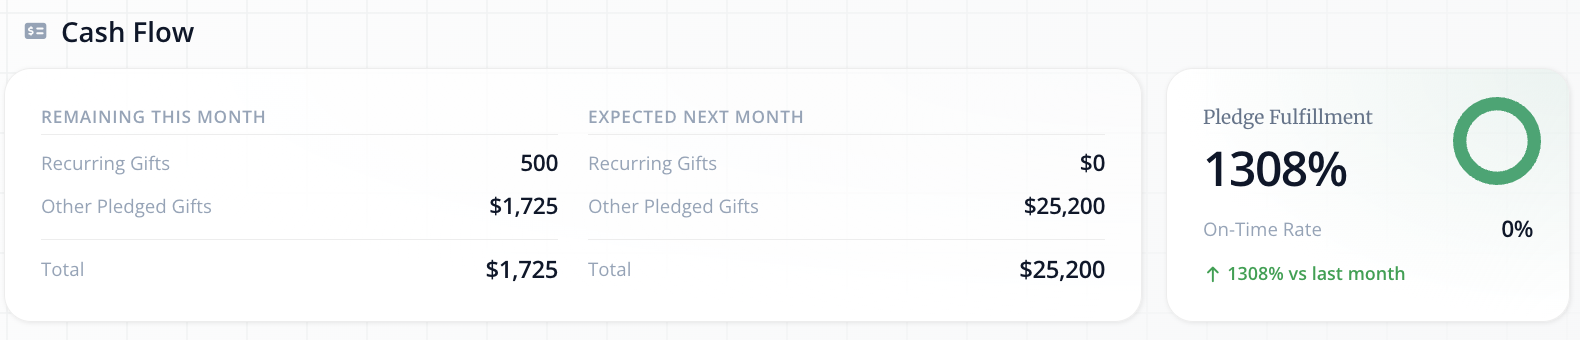
Cash Flow
The Cash flow section helps you keep a close eye on the movement of money coming into your church or organization during a certain time period. Take note of the recurring gifts section as these donations are set to come in each month, giving stability to your community!
Ready to transition your recurring gifts to Flocknote? Check out this handy guide or reach out to our team at help@flocknote.com for step-by-step instructions.
Reach Outs
A huge part of collecting donations is communicating with community members about opportunities to give! The Reach outs sections show anytime you've sent an email with a Smart Button or sent out a Reply-to-Give text. Here you can view the details on how many people you reached, how many donors, and the amount raised.

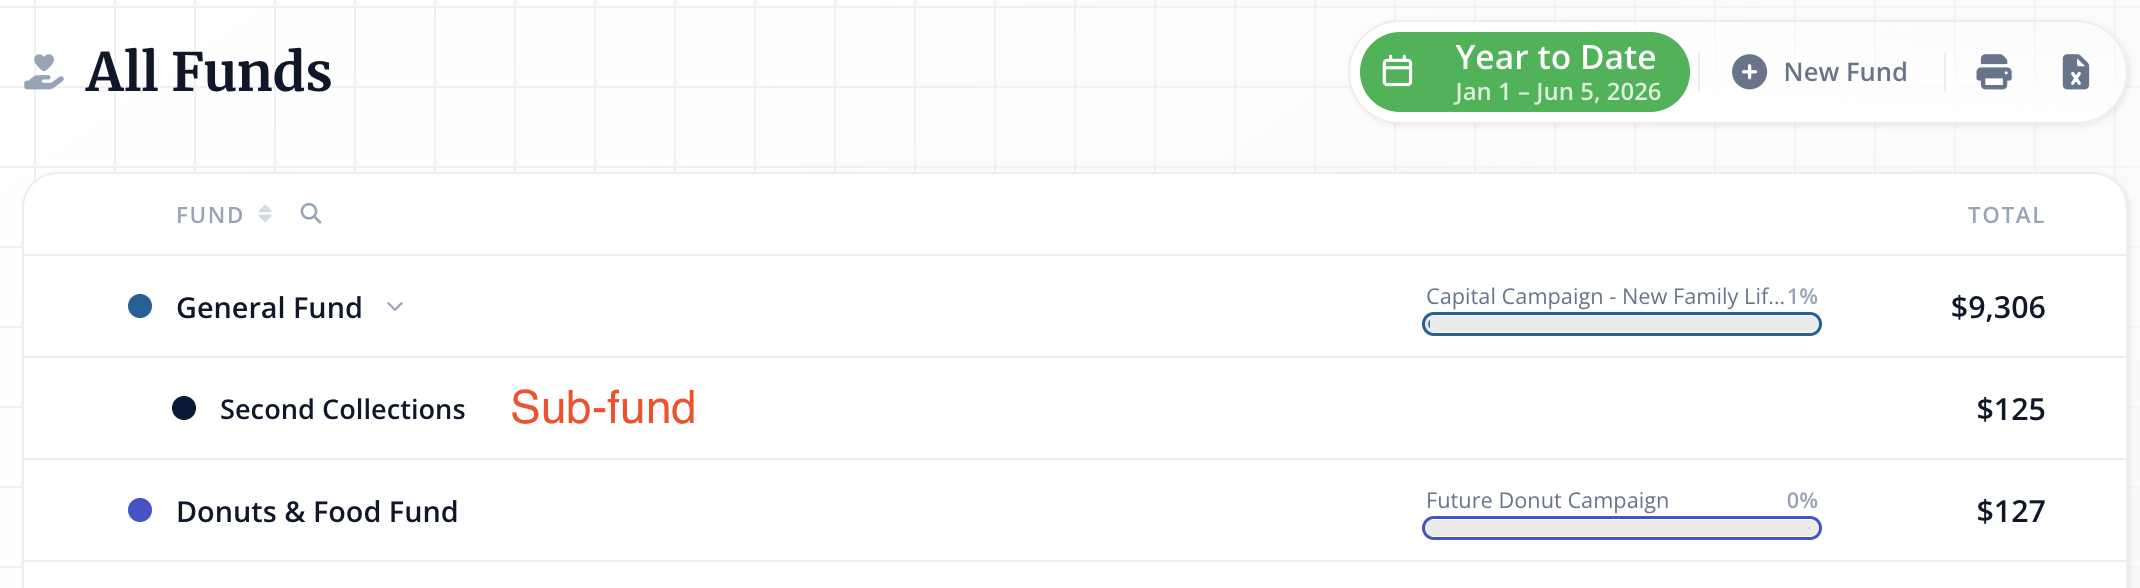
Funds (and Sub-Funds!)
On Flocknote, you can keep your donations and gifts organized with two levels of funds - Funds and sub-funds. The funds page will list all of your funds and sub-funds, which trickle up into funds, and are a helpful way to separate different ministry funding at your Church.
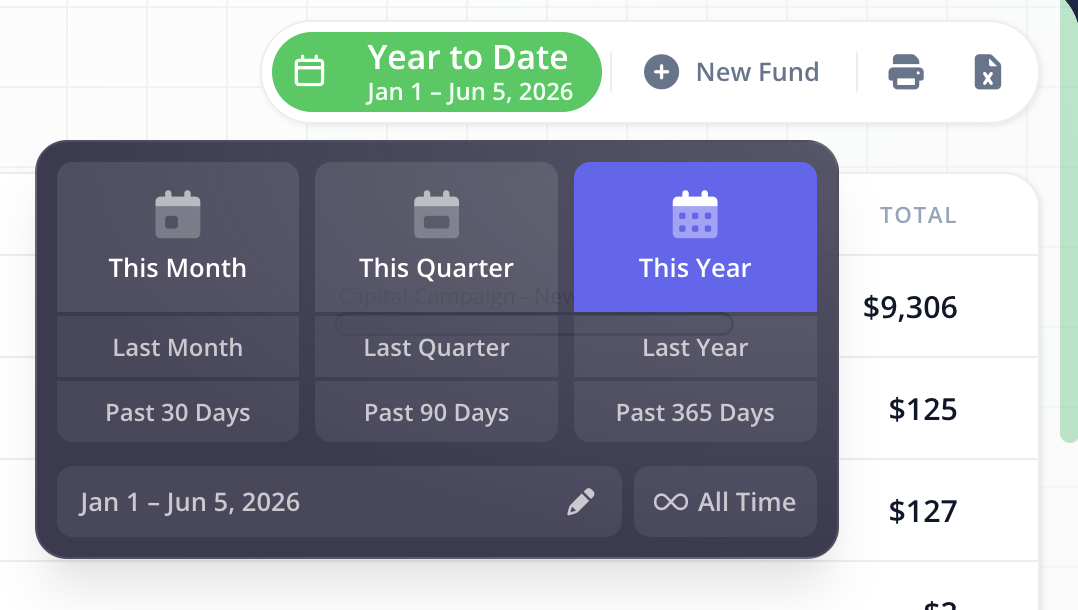
At the top right of the page, you'll see a green button to select a date range, a + New Fund button, a print button, and an export button.
The print button will generate a giving summary that is formatted for print, while the export option will give you a spreadsheet.


Create a new fund ⭐
To create a new fund, select the + New Fund button at the top right of the page:
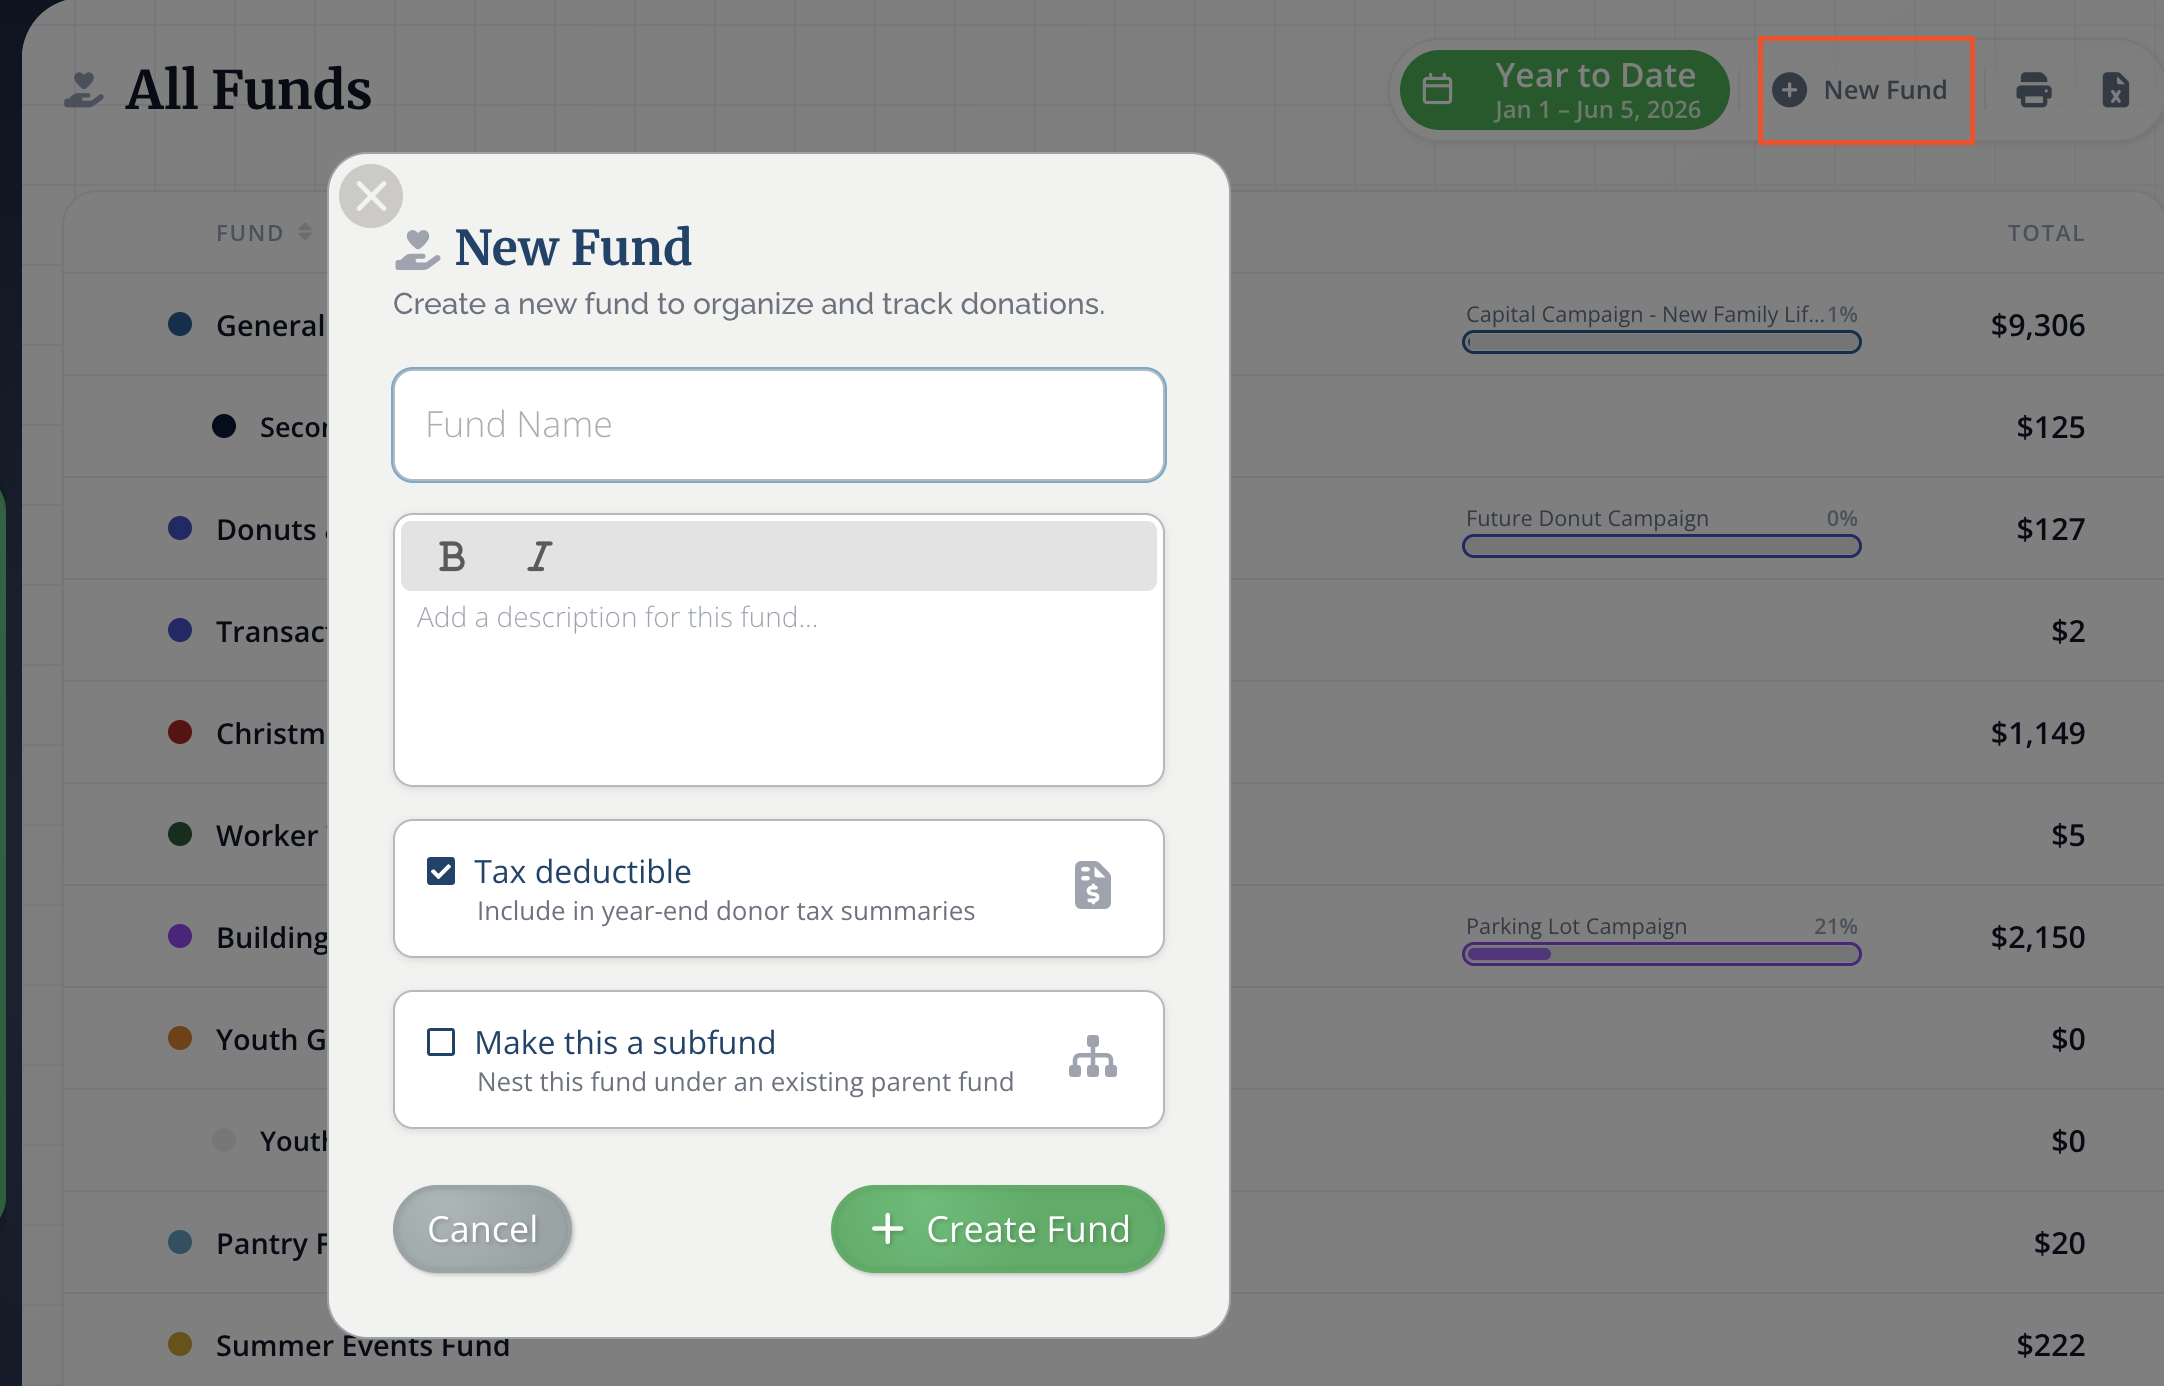
You'll name your fund and give it a description, you can mark it as tax-deductible or not, and decide whether or not it will be listed under another fund as a subfund.
Individual Fund Page
To see the donations for an individual fund, click on the name of the fund itself. You can learn more about individual funds and their settings through our Working with Funds help guide!
Campaigns
The campaigns page will show you all the campaigns for your church or organization, whether they are active, in the future, or in the past.
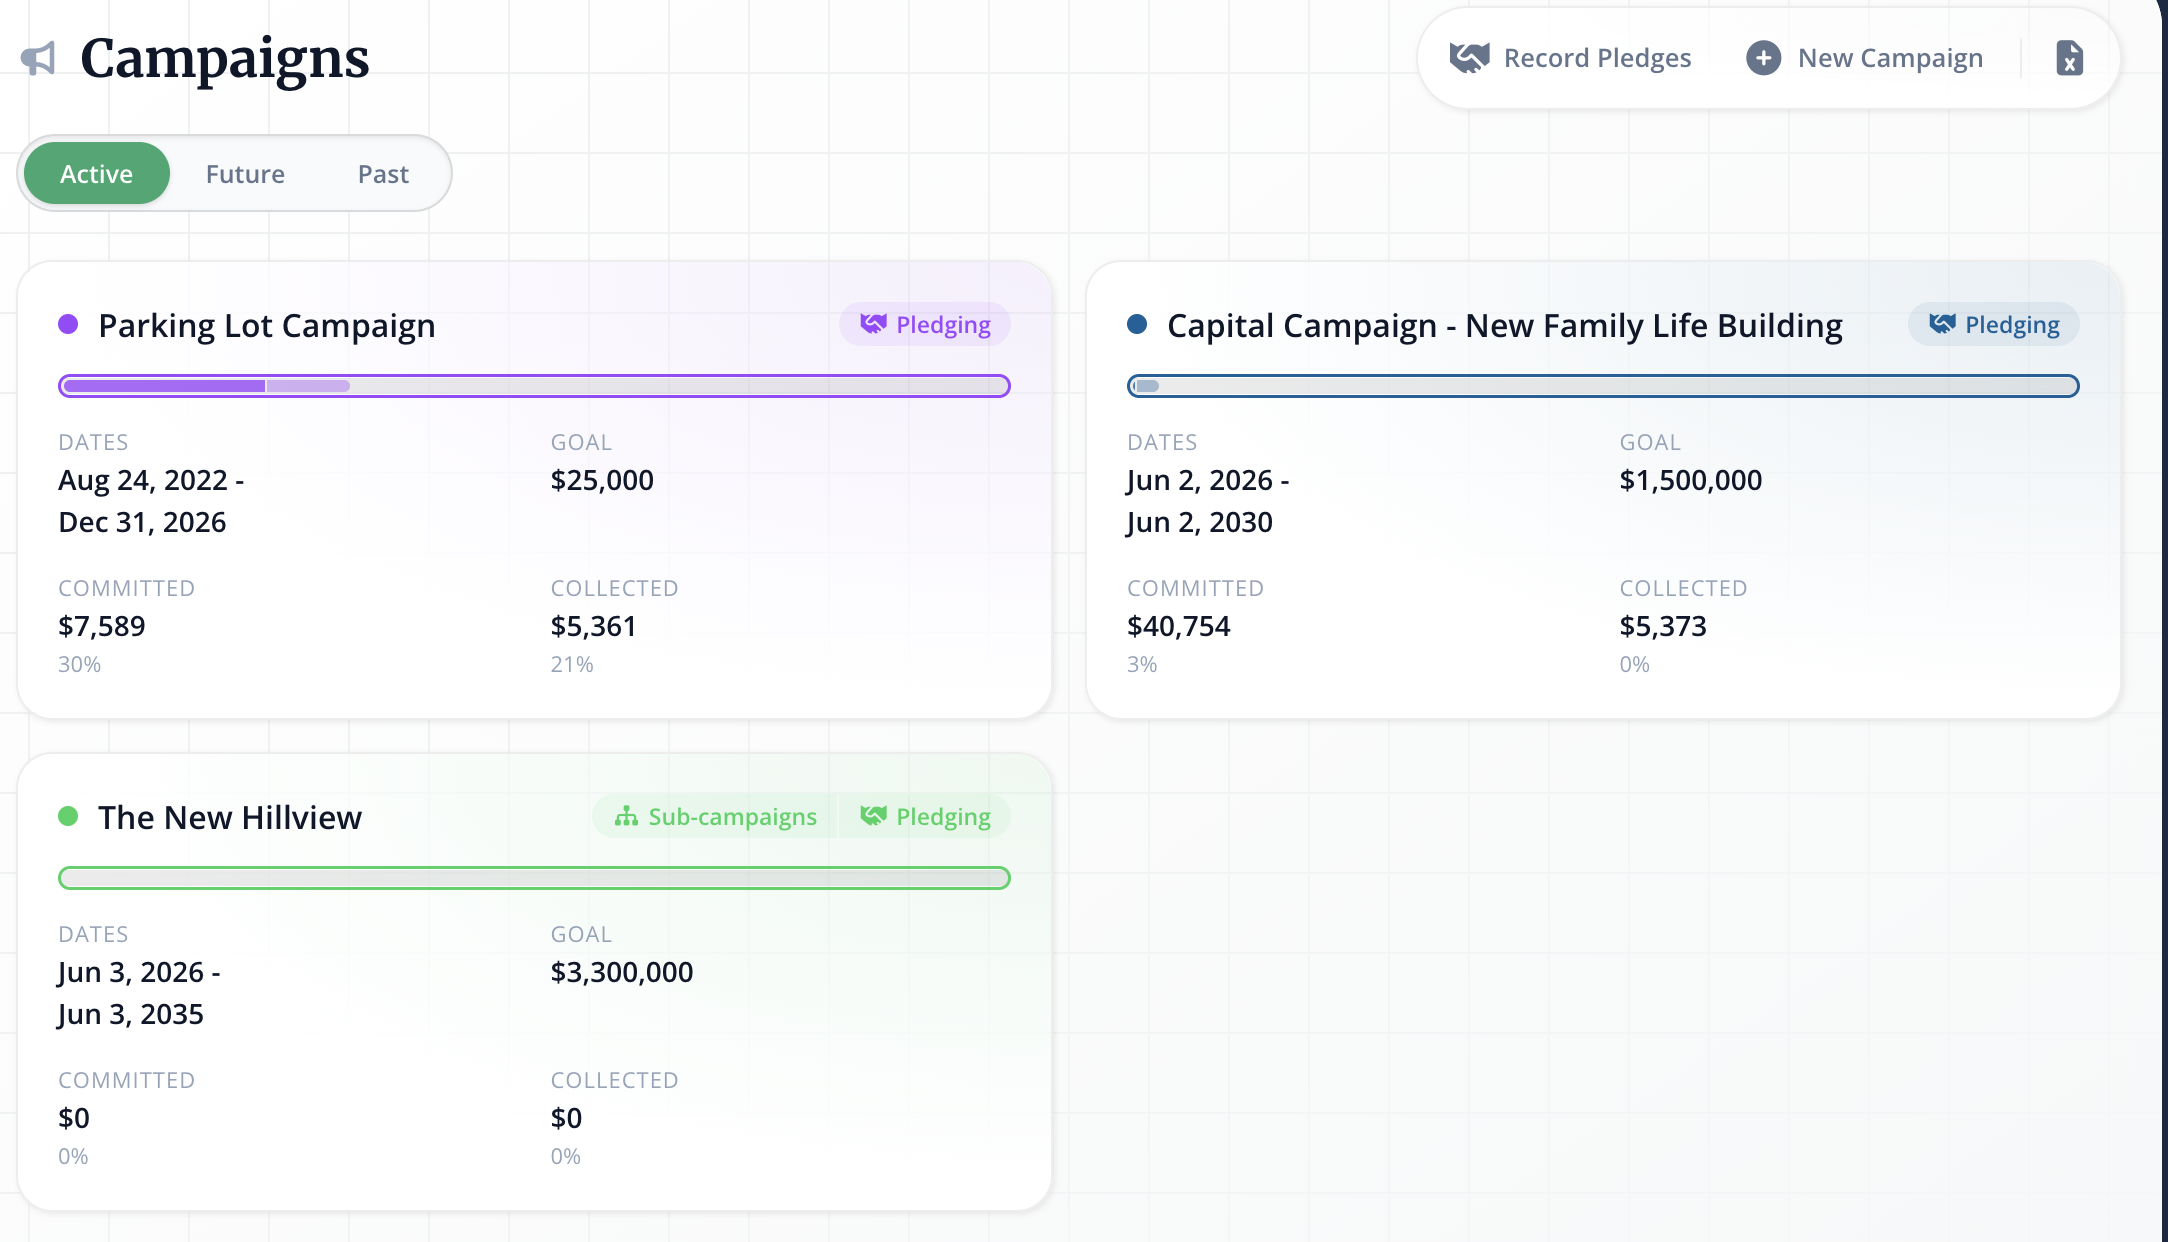
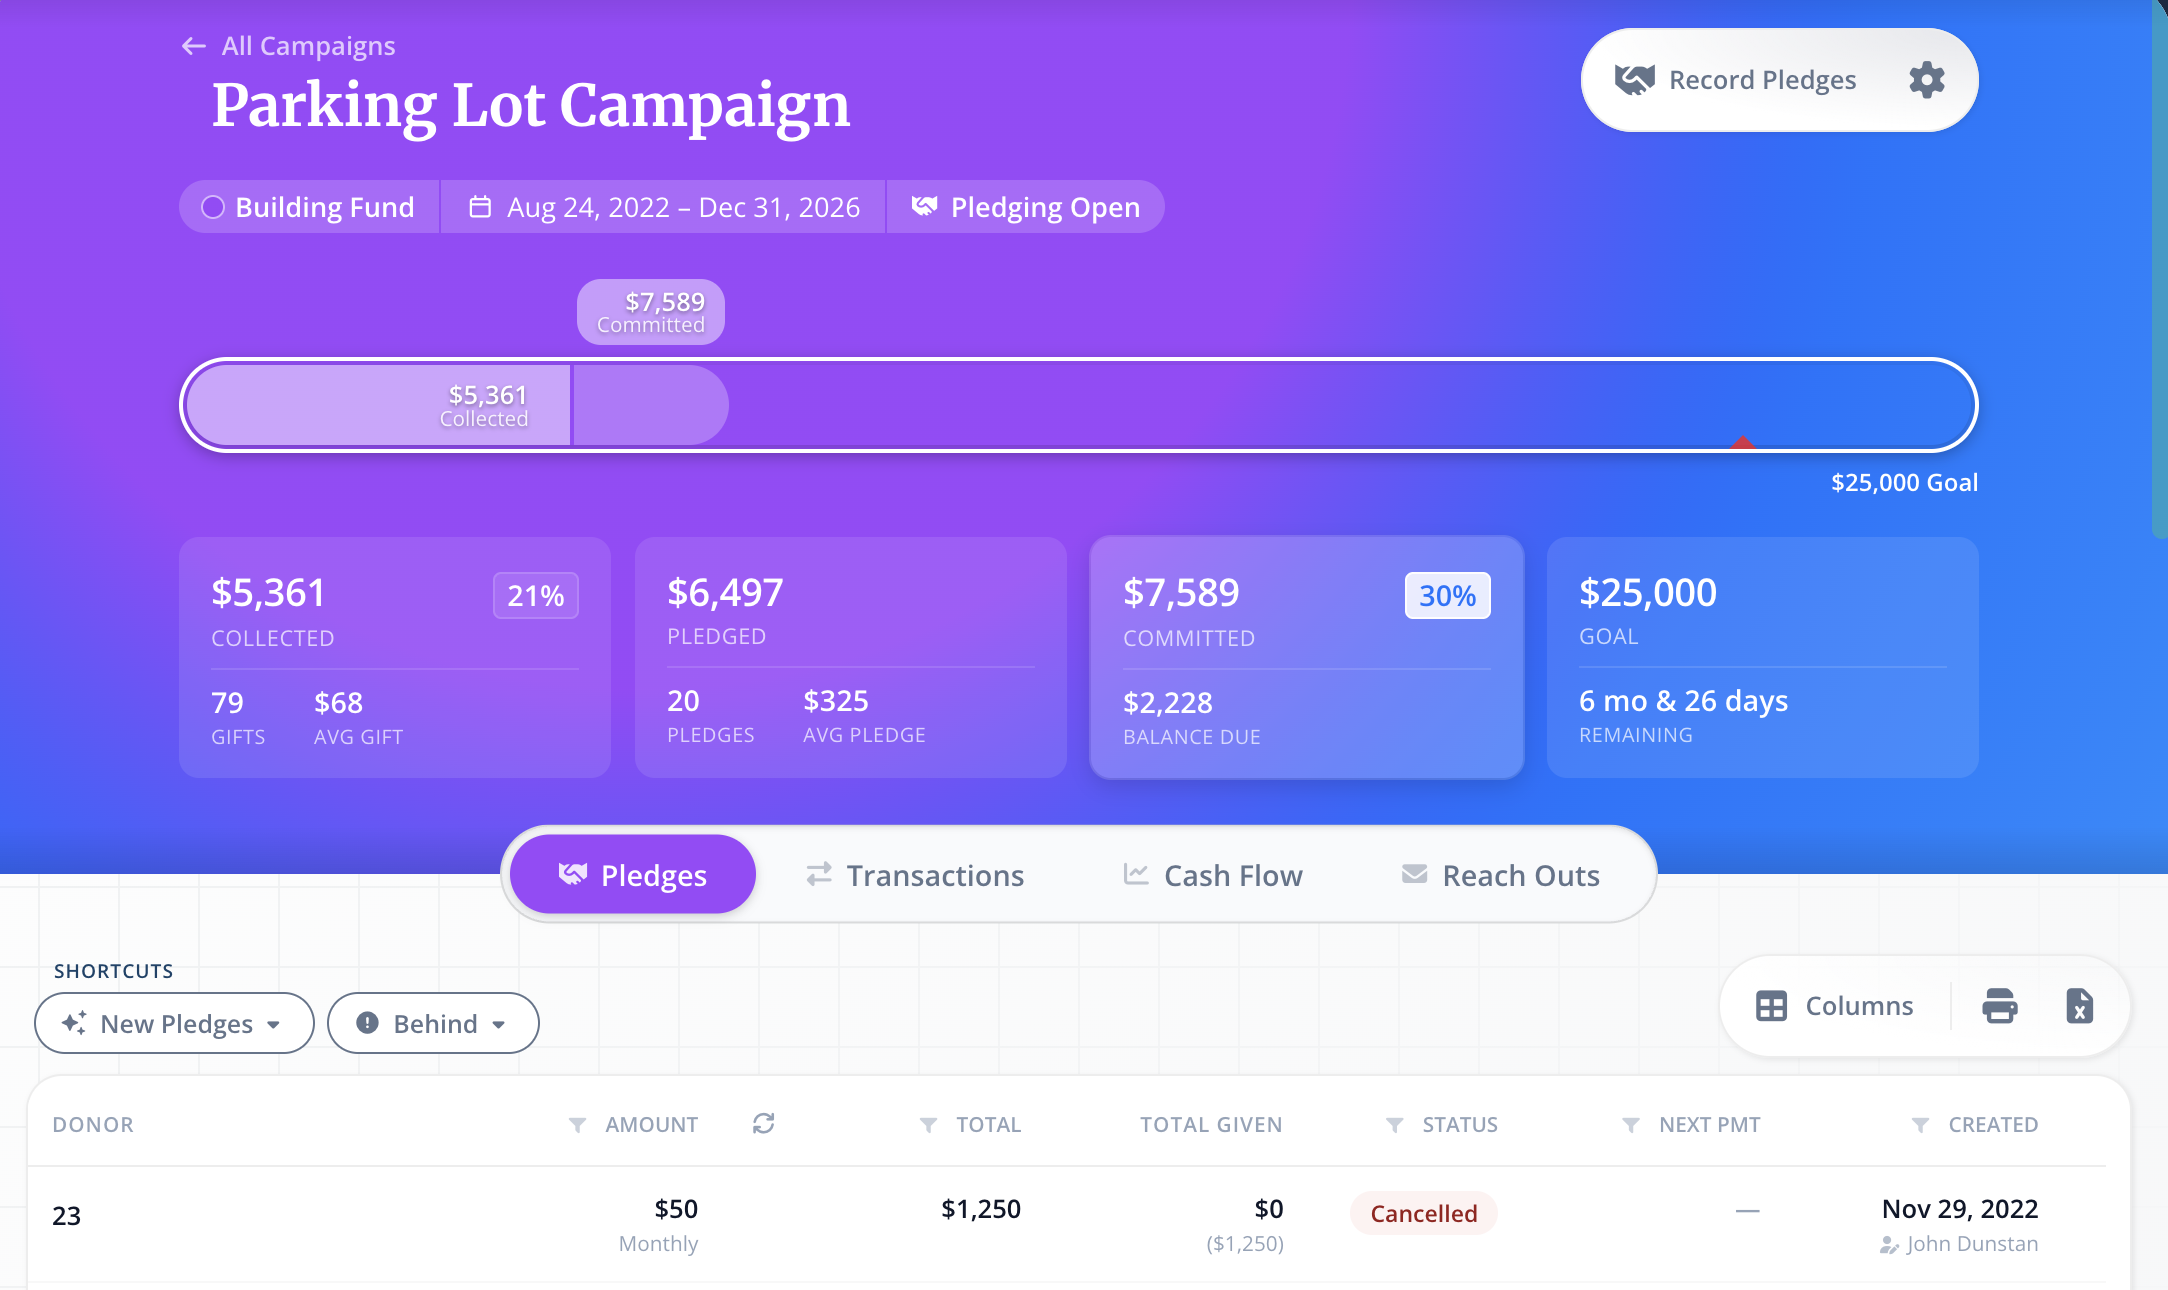
Click on a Campaign to see a detailed breakdown of the money that has been pledged and collected. Dive deeper into campaigns through our Campaigns and Pledge Tracking help guide.
Batches
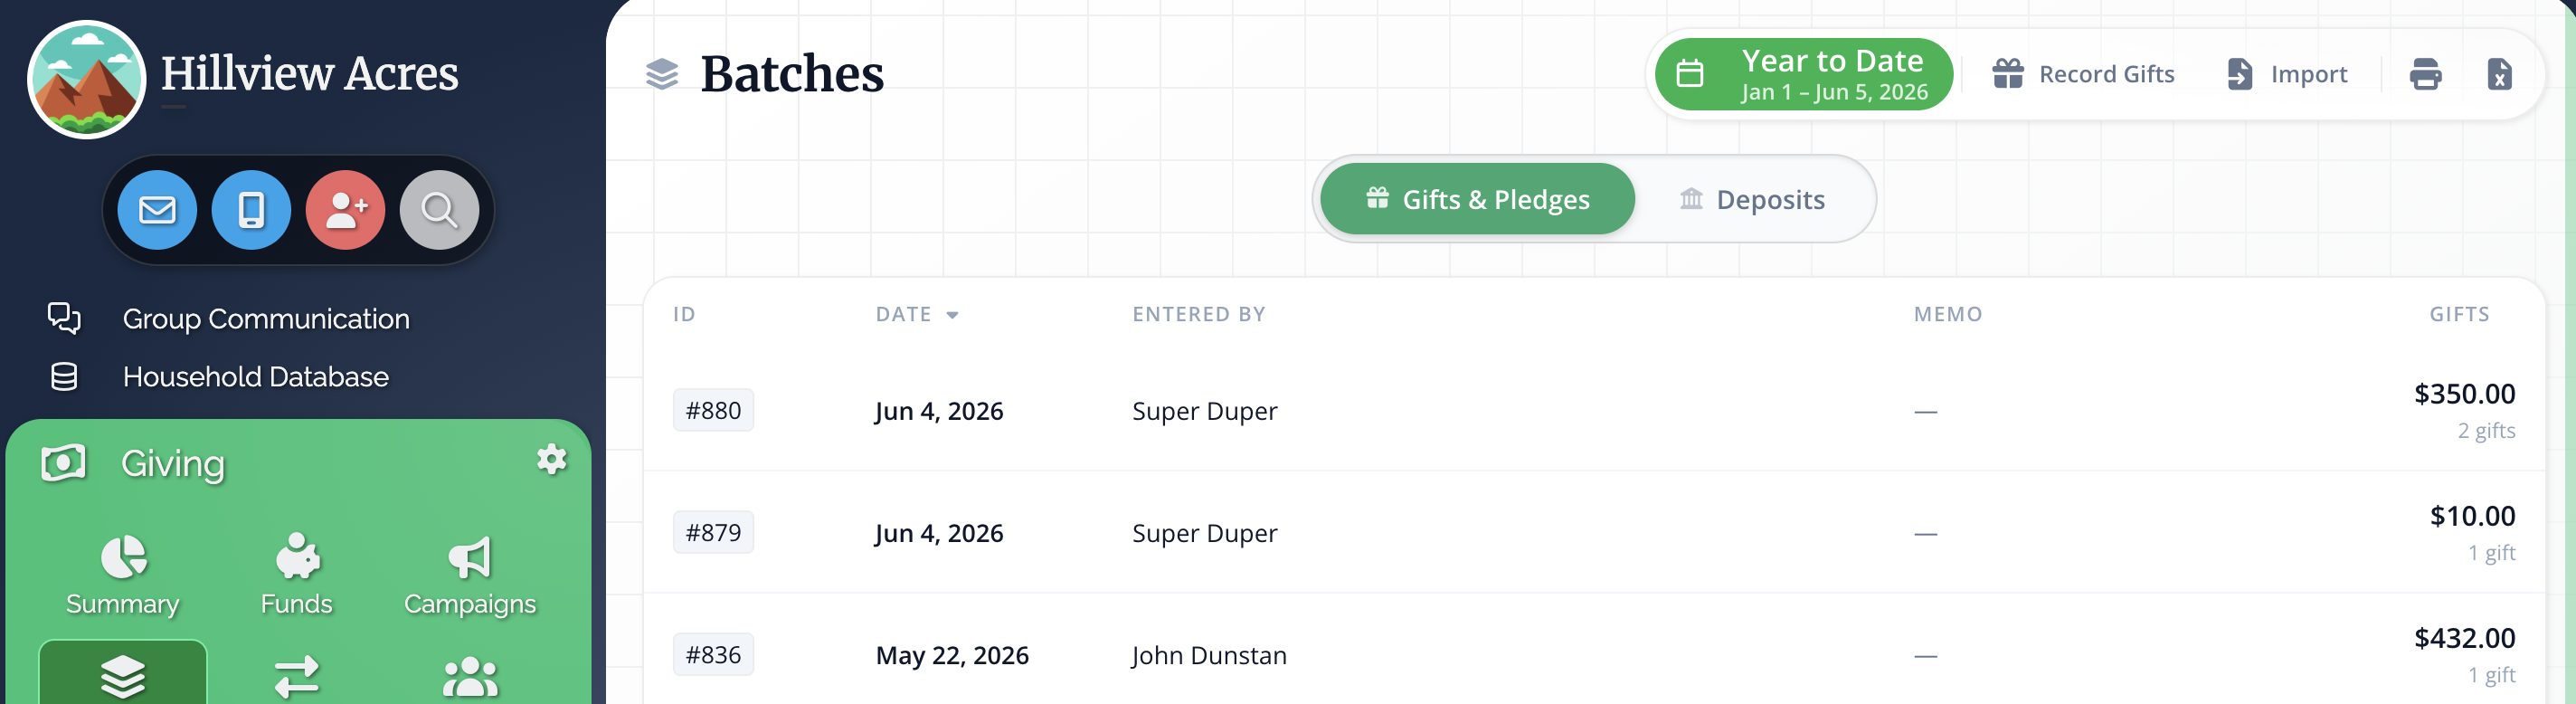
The Batches page is where you can manually enter gifts, either one by one or in bulk through a spreadsheet import. You also can view and export Deposit Reports if you have our Online and Mobile Giving features enabled. Learn more about how to enter gifts through our How do I record gifts/donations? and How to view Deposit Reports help guides.
Transactions
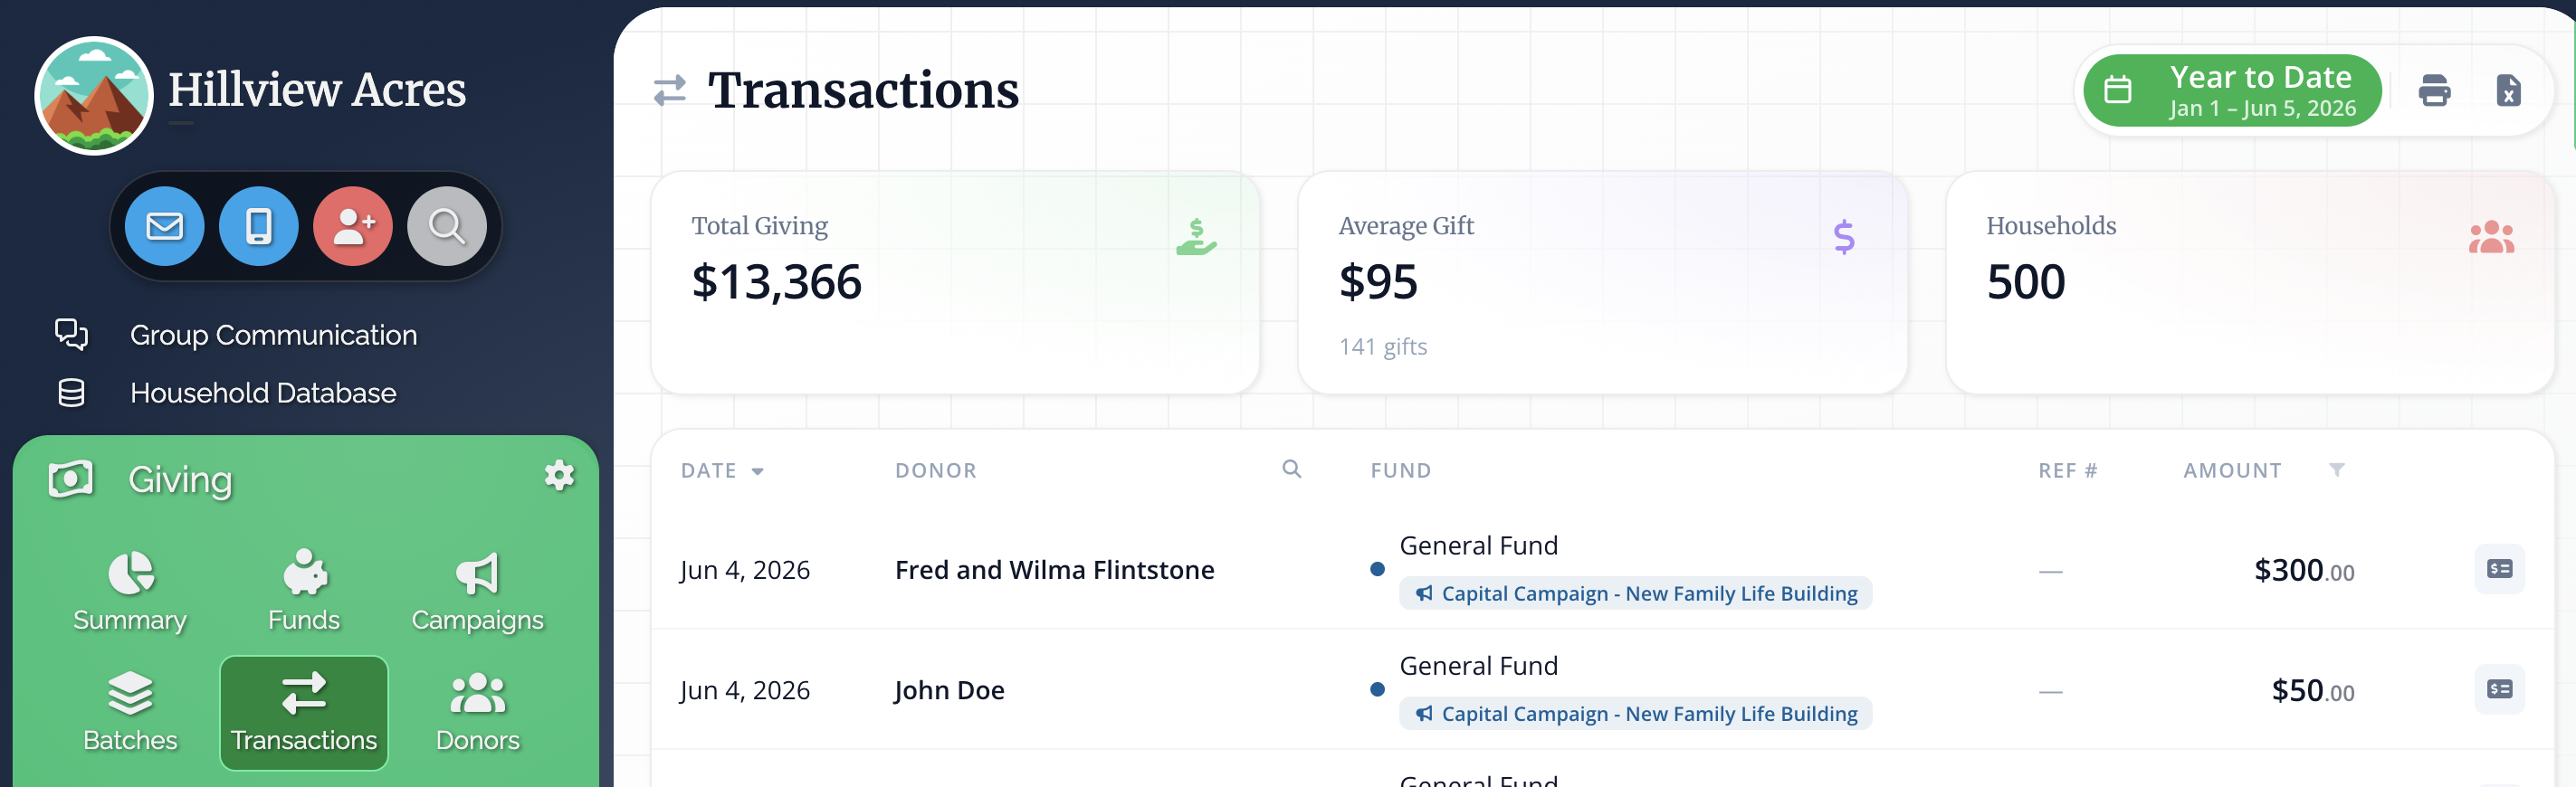
The transactions page will show you all of the transactions for the selected date range (adjust the date with the green button in the top right-hand corner). You can view the total amount, average gift, and how many households have given within that time period. You can also see a detailed breakdown of each transaction, including the donor name, the date of the gift, the fund it was given to, as well as any reference number, the total amount, and the payment method!
🔍 Pro tip! You can use the search icon here to search for a particular donor's gift!

Donors
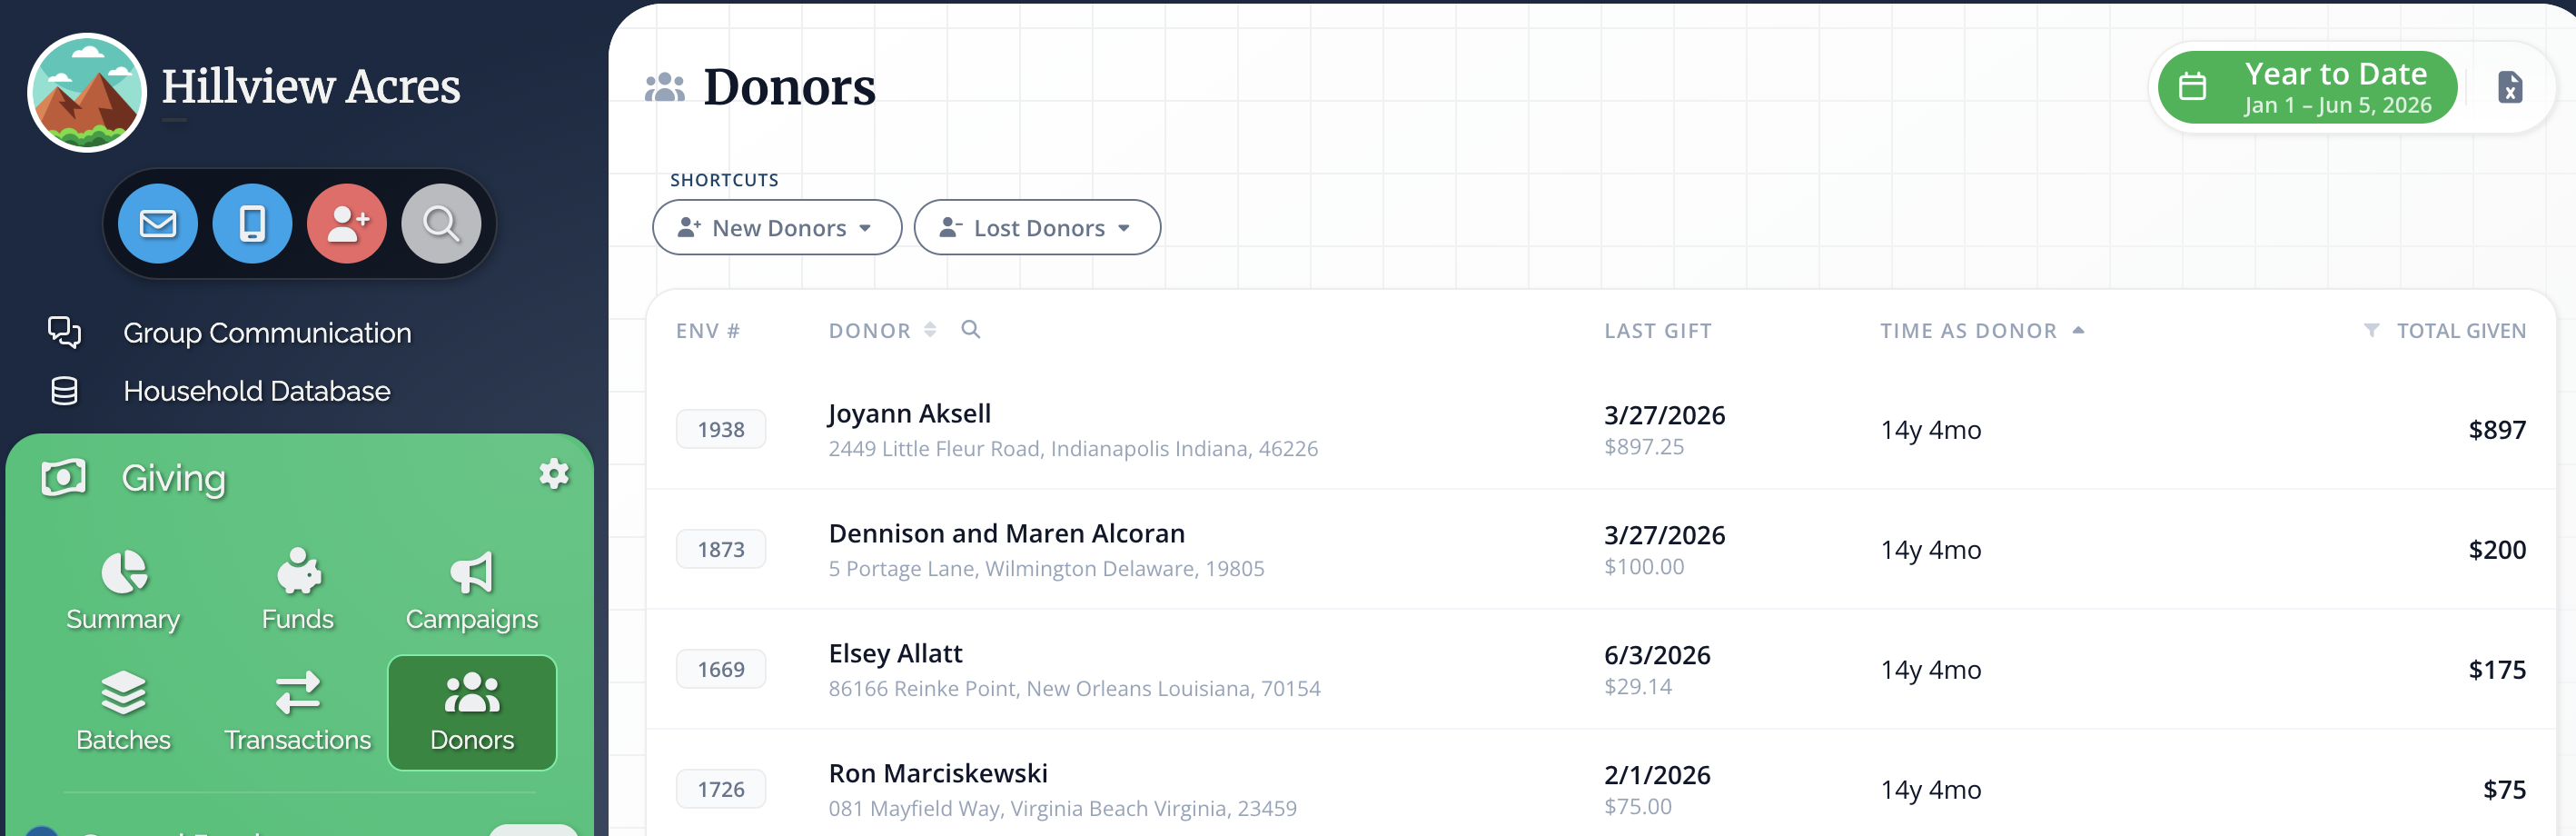
The Donors page will give you a list of all of the donors within your network right here on the Giving page! You can adjust the date range at the top, and export the donor information via the export button at the top right of the page.
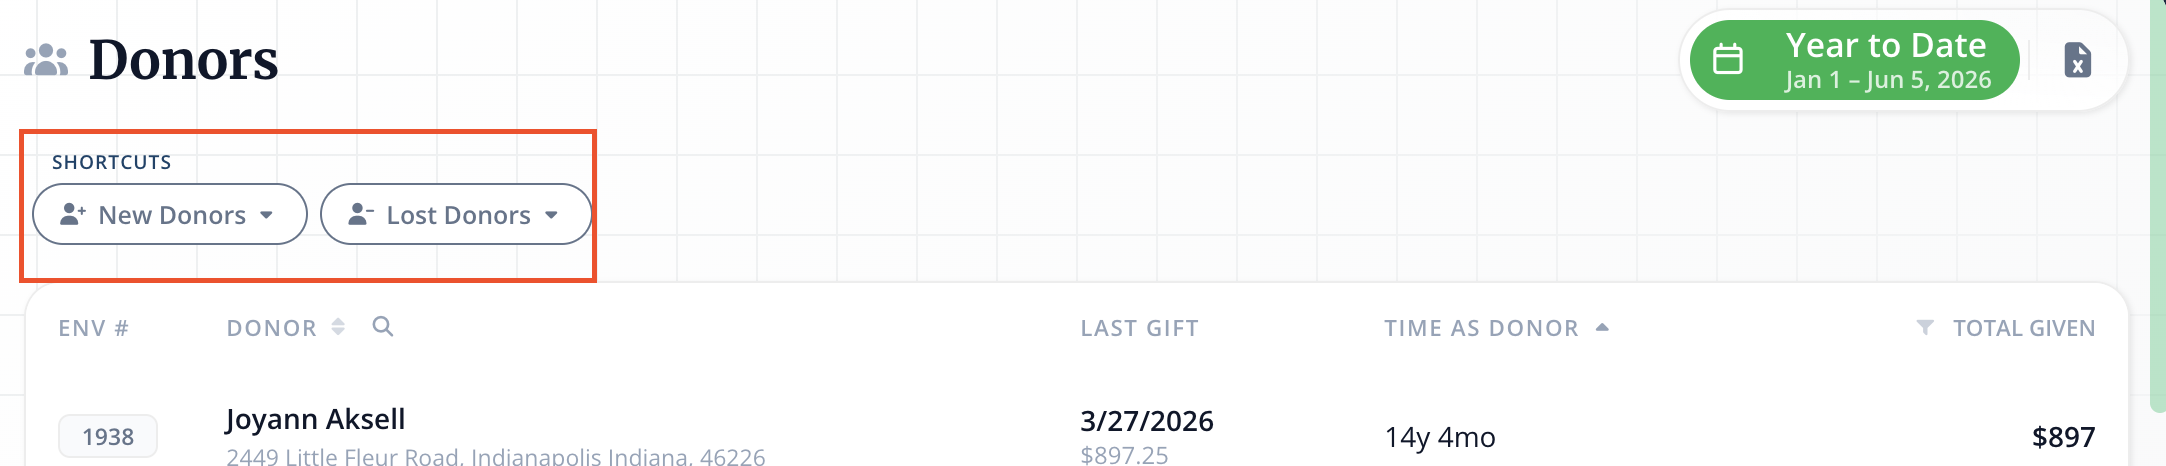
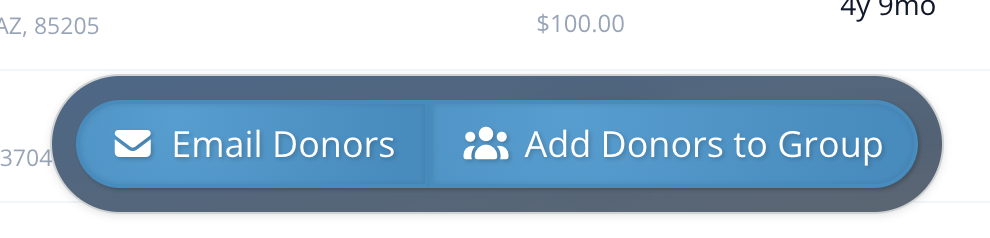
You can filter for new or lost donors through the two shortcut buttons at the top. This is a great way to filter your list and reach out to any new or lost sheep! At the bottom of the page, you'll see an option to Email Donors or Add Donors to a group.
Have questions?
If you have questions about navigating any of these pages or how to increase your impact to raise funds that build an active, thriving community, reach out to us at help@flocknote.com.
Classic Giving
Similar to how the Unolytics page gives you a bird's-eye view of the communication engagement on your network, the Giving Tracking page shows you a high-level view of all the giving and financial activity on your network. For more detailed looks at each of our giving features, check out the articles at the bottom of the page.

View Specific Date Ranges
The statistics on this page can be sorted by any set time period that you prefer:

Set up Customizable Funds
View the number of gifts and dollar amounts given by fund name and then click on each fund to see more detailed info, like individual households, the amounts given each day, and which payment method they used. You can also make Fund Settings changes, as well as export and print reports on this page.

Gather Detailed Stats
After selecting specific date ranges, you can filter the view by the number of gifts or the amount given. From there, you can break those stats down further by fund designation and payment method used.

Export Gifts to a Spreadsheet
If you'd like a printed-out report of your member's donations, you can do so by selecting the Export Icon next to Giving Summary or the title of the fund you have selected. Once you make your selection of the three options below, an Excel spreadsheet will be downloaded to your computer.
You'll have 3 options:
Export Giving Summary
This will generate a spreadsheet with a list of your funds, Fund ID (Designation ID) how many donations you received in the period selected, and how much is in that fund:

Export All Gifts
This will generate a spreadsheet that includes the household that donated, their associated envelope number, the amount of their donation, payment method, transaction status, reference number (for checks, etc), any memo included, the fund name, and the fund ID (Designation ID).

Export Combined Gifts
This option will generate a spreadsheet with more detailed information on your donors, including a salutation (if you have that added as a profile field), mailing address, email, phone, envelope number, and the combined total donation amount.

Record Gifts in Batches
Flocknote Complete subscribers can record gifts given outside of Flocknote, either individually or in bulk batches, on this main Giving Tracking page.

- Click Record Gifts in the green Giving section at left.
- Select the date by clicking the calendar icon.
- Enter in a special memo (optional) for the particular batch you are starting.
- If you are currently tracking pledges for any campaigns, you will have the option to check a box to apply any applicable gifts in this batch toward member pledges.
- When you are ready to begin, click the blue Enter a batch button.

-
Once on the input page, type in the various boxes to add info. You can input by envelope # or locate specific member profiles by typing out their names until a dropdown appears.
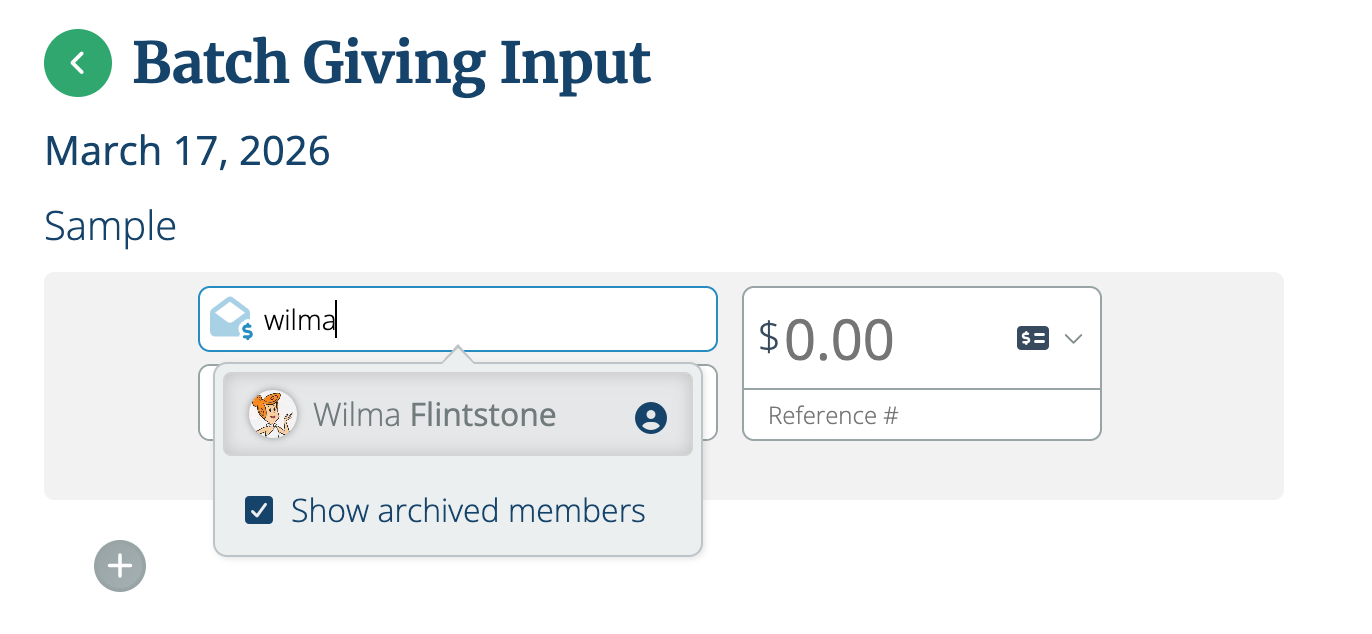
- Click the caret "v" icons to open up drop downs for selecting which fund the payment was made to and select which payment method was used. You can even split a payment between two funds by choosing to + Add another Fund and entering how much of the total payment should be allocated to each.


- Make sure to click the green Save button after each gift and then the green Complete button when done with your batch.
Import Gifts via a Spreadsheet:
- Click Record Gifts in the green Giving section at left
- Click Import a File.

- From there, simply upload the file (in CSV or .XLSX format) from your computer (see example below). Please note that the only columns needed are envelope number, fund designation, and the dollar amount given. You can also have a column for payment type and specific dates. You can also set it as one date by adjusting the Batch Date (see picture above).
We recommend formatting your spreadsheet like this:

If you've already added envelope numbers to all members' profiles
that you're importing gifts for, your spreadsheet can look like this:

🚨IMPORTANT NOTE: Giving data is recognized by envelope number. If you have not added envelope numbers to member profiles, you will need to format your spreadsheet with an envelope number column + an email address column to identify the number and tell the system to add that envelope number to their profile. If you import data for an envelope number that does not yet exist in your network and you do not include an email address to attach it to, the data will not be added to a profile until that specific envelope number has been assigned. Once it's assigned, all historical imports with that envelope number will be added to that specific member's profile or household at that time.
Manage My Giving and Public Pages:
Churches that have enabled secure payment processing will see blue Public Page links below each of the fund names, as well as a main blue Member Giving Page button at the top of their list of funds under Designations.
- Member Giving Page - Clicking this blue button will bring you to the unique page for your church that allows your members to give a gift to any public funds, track their pledges for a campaign, view recent transactions, access their tax summaries, and see their year-to-date giving. This page is customizable to your needs. Learn more HERE.
- Public Page below individual funds - Clicking this blue button will bring you to the unique page members can use to give to this specific fund.
These pages can be shared easily with your members by copying the unique URL and then sharing that link on your church website, social media, or anywhere you'd like! There are also additional sharing settings within each fund for QR codes and flyers!

ADDITIONAL FEATURES include automatic email receipts, printable/exportable reports, and donor summaries (end-of-year tax statements). If you have any suggestions, questions, or feedback, contact your friendly Happiness Engineers at help@flocknote.com! 👍