How do I set up Family & Visitor Registration?
Welcome new members and keep existing members up-to-date with our Family & Visitor Registration feature!
Getting Started
Your network must be subscribed to Flocknote Complete to have access to the Family & Visitor Registration feature, and only Super Admins can access this feature to set it up and edit it. Once you are logged in:
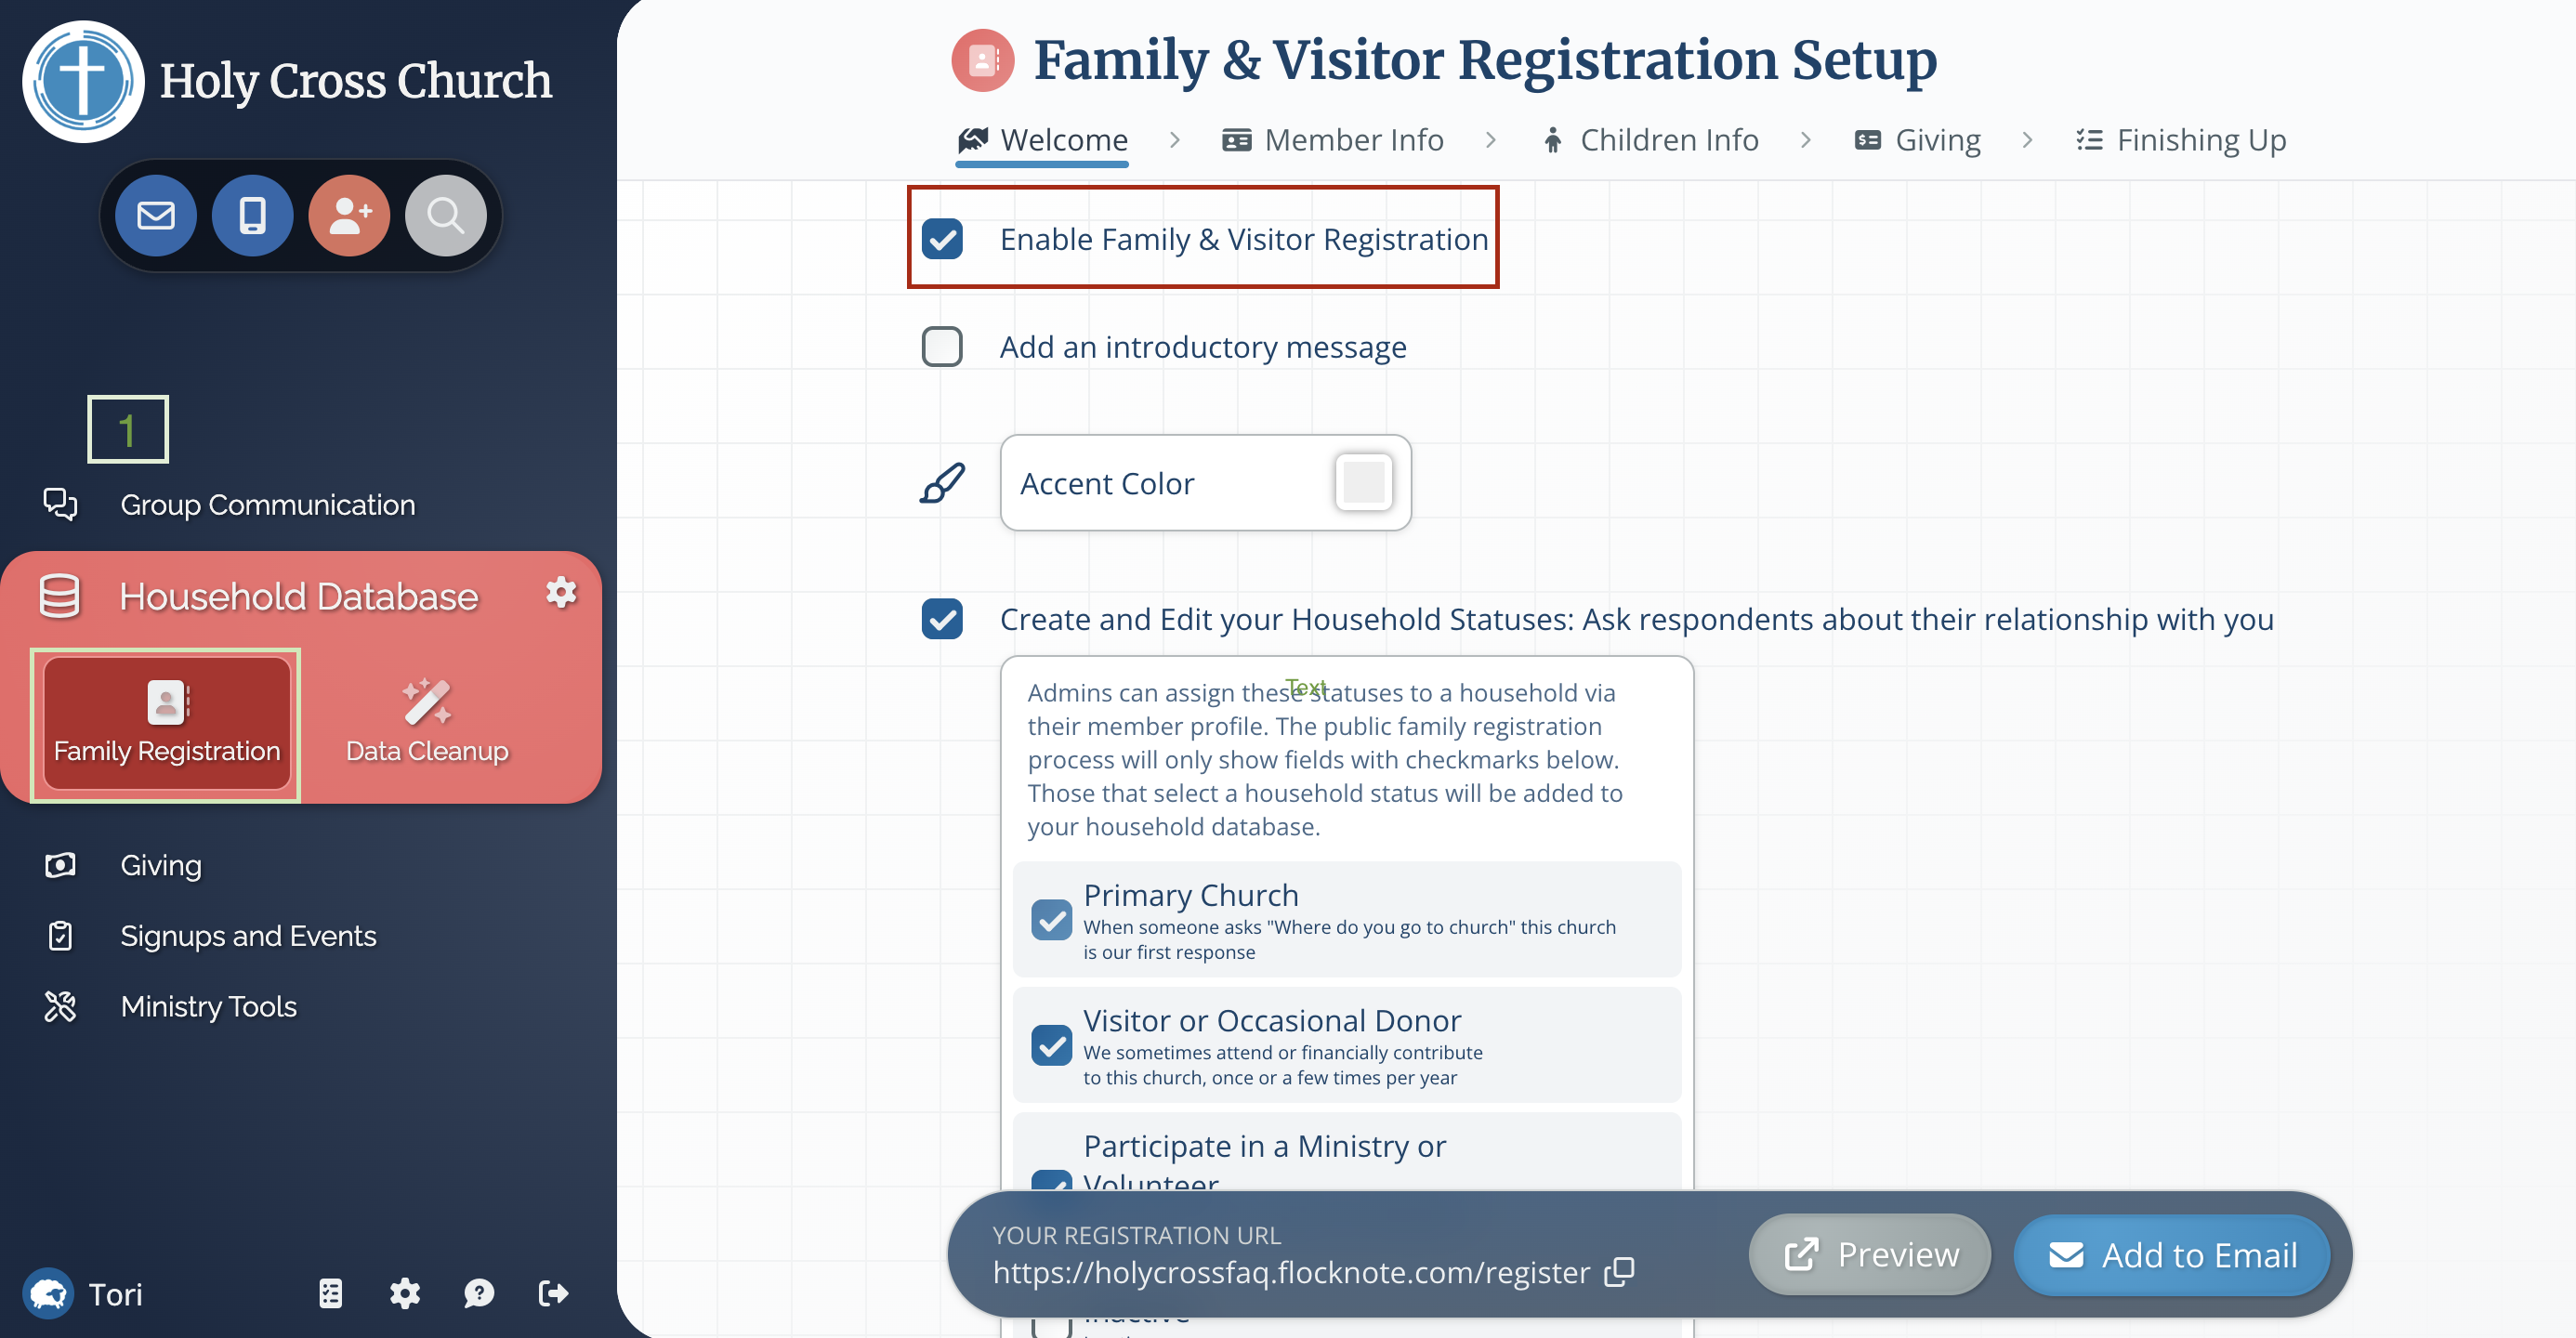
- Click on the Household Database tab and select Family Registration
-
Enable or disable Family & Visitor Registration for your network using the checkbox by the first option on the Welcome tab of the Setup page (note: this option may be enabled by default for specific diocesan networks).
- Visit each of the five tabs along the top of the Setup page to customize your Registration. The tabs are as follows: Welcome, Member Info, Children Info, Giving, and Finishing Up.

How can I preview the selections I have made?
To view your Registration page as your members will see it, click on the Preview button found at the bottom of any of the Family & Visitor Registration Setup pages at any point during the set up.


1. Welcome
These settings determine the first page members will see when they visit your registration URL.
- You can add a personalized introductory message, or leave that box unchecked to go with the default text.
- Choose an Accent Color that will determine the color theme of the page your members see.
-
Select whether or not to ask members about their Household Status. Registered Member is unable to be unchecked because it will always be on by default when using this function. You can add as many Status options as you'd like by clicking + Add a New Status. The choices you make can be edited, reordered, and deleted by hovering over them in the list. Clicking the pencil icon also allows you to adjust how the wording will appear to the member filling out the registration.
The Status a member selects will be captured on the INFO tab of their profile. If you would not like members to be able to indicate their Status simply uncheck the box for this section.
2. Member Info
The settings on the Member Info tab determine what information will be collected about each member during registration. You will see a list of:
- the default fields collected with Family & Visitor Registration (with grayed-out checked boxes beside)
- any custom profile fields that are currently being tracked on your network. You can select or deselect any of the fields to designate whether they are included in your Registration process for members.
If there are any other fields you would like to start tracking, click Manage profile fields to add more custom profile fields to your network. [Learn more about custom profile fields HERE.] Any new fields you add to the network will become options to select or deselect on this Member Info tab of your registration setup.

Why would a custom profile field we are tracking on our network not show up as an option on this checklist?
Profile fields can be tracked for the network as a whole or added to a specific group to track the information for only members who belong to that group. For a profile field to appear on this checklist and be included in your Family & Visitor Registration, it must be added to the network as a whole rather than a specific group or groups.
To add a profile field that was previously only tracked in a specific group to the network as a whole:
- Click on Household Databasein the left-hand menu.,
- Click on the settings cogwheel icon in the top right corner.
- Choose Profile Fields from the drop-down.
- On the Profile Fields menu, look for a section called "Other fields in your network", find the profile field you want to move to the network as a whole, and click on it.
- From here, you simply need to scroll down and click the green Save button.
This profile field will now appear on every member's profile and be included as an option on the Member Info tab checklist.
Putting newly registered adults in a group
Everyone whose information is collected through the Registration process will be added to your Everyone group automatically.
You also have the option to check a box to add these members to another group of your choice. In this case, a blue button appears to allow you to customize the Welcome Message for that group, which would be sent automatically to all newly registered adults as they are added. [Learn more about Welcome Messages here.]

Spouse Information
After members enter their own info, they will see the question above. If they indicate they are married, they will be asked to fill out information about their spouse. These will be the same fields that were selected on the Member Info setup tab, plus your anniversary date.
3. Children Info
After members are finished entering information about themselves (and a spouse if applicable), they will be asked whether or not they have children:

- The Children Info tab of your registration setup will allow you to select which profile fields members will be asked to fill out for their children.
- Members will also have the option to enter any unique contact information for their children if applicable.
- All children will be added to your Everyone group, but you can check or uncheck a box to add newly registered children to another specific group of your choice. In this case, a blue button appears that allows you to customize the Welcome Message for that group, which would be sent automatically to all newly registered children (if they have contact information) and their Proxy Contacts as they are added. [Learn more about Welcome Messages here.]
4. Giving
Enable and verify Flocknote's Online Giving tool to make the most of our Giving features in Flocknote, including accepting tithes, taking donations for events, collecting payments on your Signups, and more.
Without Online Giving —
You will only have the option to ask members whether they would like to receive giving envelopes from your church. With this box checked, you will be given a link to a new report used to track respondents.
With Online Giving Enabled —
In addition to asking members if they would like to receive giving envelopes (as listed above), you will also have the option to invite members to set up recurring giving. You will then select a single fund that any recurring giving set up through this Registration process will be attributed to.

5. Finishing Up
You have a few options when it comes to what members will see when they complete their registration:
-

Add a custom message for members to see as they finish signing up, or leave this option unchecked to show the default (a simple, "Thanks for registering")
- Choose what you would like to happen when members finish their registration (see below).
- Choose whether or not to include a textbox option for members to leave a note (which would be sent to the email address of the admin you select)
- Choose if you (or another admin) would like to receive an email notification when a family completes family registration

Where should I send members after they complete their registration?
You can always choose to just show members the closing message and have the process stop there, but if you want to make the most of the opportunity while they are already connecting with you, consider what you would like to be their next step! If you aren't sure, here are some handy ideas:
Take them to a Signup
- Link to your Religious Education Signup during the months when you want families signing up for that program. Consider using our online giving tool to collect payments on that Signup to make this a one-stop shop for gathering family info, having them sign up for your program, and processing their payment.
- Link to a Signup that lists different ministries at your church and invites members to sign up for whatever they are interested in. You can link the options on that Signup to specific groups so members are automatically added to those contact lists, or simply share the names you collect with ministry leaders.
- Link to a Signup that lists upcoming Volunteer Activities to give members an instant opportunity to get involved! You can send out an email to the members who sign up for each activity when the date approaches, or create a group for each event's respondents.
Take them to a new webpage
- Link to a welcome video from your pastor on a video hosting site or your church website
- Link to a page on your church website that shares the times of your Sunday services.
- Link to a page on your church website that details how an individual can get involved in your church community.
- Link to a page on your church website that shares about your church and your mission.
Take them to the Member Giving Page
When you have our Online & Mobile Giving features enabled, members can view all of their giving in one easy spot with the Member Giving page! The Member Giving Page is a one-stop shop for members to set up recurring tithes, make one-time gifts, and see their giving history. Learn more about this HERE.
Registration Notifications
Last but not least, you can receive an update each time a family completes your registration process. Stay up to date by navigating to the Finishing Up section and checking the box for email notifications (shown below). Then simply select the names of the Super Admin(s) that would like to receive those notifications, and you are all set.

With these customizable features of Family & Visitor Registration, you can capture the up-to-date information just the way you like it—for active families in your church as well as newcomers looking to get connected with your community!