How to Collect Money Directly on a Signup
Whether you are selling tickets to an event, collecting religious education fees, or fundraising for your youth ministry, collecting money directly on a Signup makes your job easier than ever!

Note: If you have not enabled our online giving features just yet, you will be prompted to add online giving to your Flocknote network before collecting payments with Signups. There are no contracts, monthly fees, or setup fees required, and you can get started in minutes! Click here to learn more.
In this article
Getting Started
All of your existing and new Signups now have the option to collect payments! Collect retreat fees, charge admission to the parish festival, and so much more! The possibilities are endless!
Create a new Signup from scratch by clicking on the Signups & Events tab on the left-hand side panel. Then select the purple + New button at the bottom of the pop-up or click the purple New Signup button at the top right-hand corner of the page to start building your Signup. For additional help creating a new Signup, check out this handy FAQ.

After selecting your Signup type and choosing a title, you will be asked if/how you would like to collect money on this Signup. (Note: You will not see this option when creating a Volunteer Scheduling Signup). If you do not wish to collect money with this particular Signup, select the bubble next to Make it free to sign up to skip the next steps and begin adding items to your Signup.
If you do wish to collect money with this Signup, choose here whether you would like to charge your members a fixed amount or ask for a suggested donation.

Either selection will bring you to the Pricing page, where you can choose the perfect pricing structure for your needs! You can select from the following options: Each item has its own price, Per-household pricing, Tiered pricing. Be sure to check out the brief description below each option when deciding which structure is best for your Signup. Or if you have questions about the best selection for your needs, reach out to us at help@flocknote.com.

- If you select Per-household pricing, you'll be prompted to enter the per-household price below before clicking Let's Go to move to the next step.

- Use Tiered Pricing to set a unique price based on the number of household members that Signup.
- To add additional tiers, click the Add a Tier button.
- Set the price for each tier by typing into the test box next to that tier.
- Remove a tier by clicking on the trash can icon to the right of the tier.

Begin Collecting Payments on an Existing Signup
Any existing Signup also has the ability to collect payments! Simply click the Signups & Events tab on the left-hand side panel, and select your existing Signup from the list in the purple pop out or in the center panel. You can also search for a specific Signup using the 🔍 Search button at the bottom of the purple pop-up.

(Signups that are already set up to collect payments will have a small $ icon (see below).

For Signups without this Icon, select the Take Payments tab at the top of the page, and select the payment structure that you would like to use going forward. Don't forget to hit the green Save button after making your selection.

What if I don't have payments yet?
If you don't have online giving set up just yet, you will see this banner! The good news is that you can click Learn More to get started on online giving in just a few steps.

Note that the ability to manage Signups with payments is available by default for all Super Admins. Super Admins can enable these permissions manually in the Account tab of any Group Admin's profile.

Choosing a fund for the money collected
When you create a brand new Signup or when you check the Take payments with this Signup box (on the Take Payments tab) on an existing Signup, a new Fund will automatically be created specifically for that Signup. You also have the option to connect the Signup to an existing Fund instead by clicking the down arrow and selecting another fund from the list.

Additional Fees and Discounts
🕒 Early Bird and Late Bird Pricing:
On the Take Payments tab, scroll to the bottom of the page. There you will see the option for both an Early Bird discount or a Late sign-up fee. Click the Add + button to the right of the option to add that fee/discount to your Signup.

From there, you can select the date the fee/discount begins or ends, as well as the amount price will be discounted or increased.

Once the Fee or Discount is added, that will appear for your members like so! This message will disappear or appear based on the date selected on the Take Payments page.

💲Other Fees: In addition to the basic fee structure for your Signup, you can also add some additional fees for individual items! Start by clicking on one of the items on your Signup and selecting the Item Pricing tab. From there, select the Add Fee option. In this case, below, we have an extra 25 fee for those who need a parking option at our retreat. Note that all members that sign-up for this Item will be charged this fee.

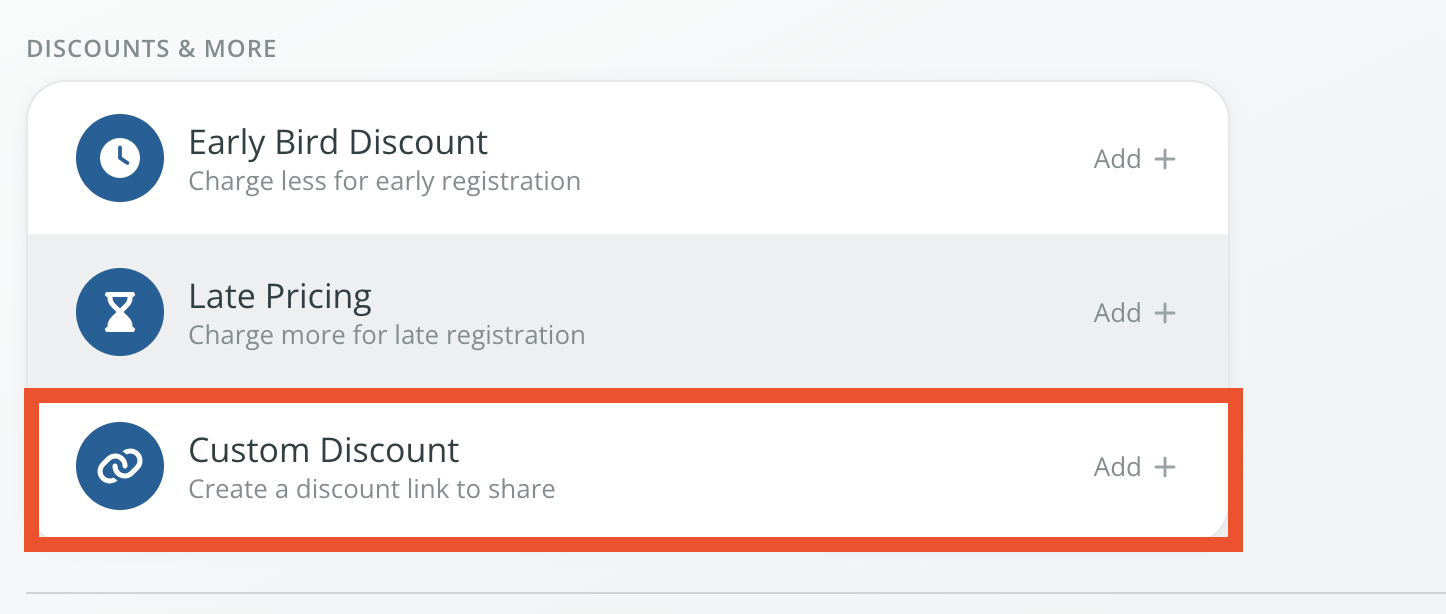
Discount Links Do you want to share a discount for a specific group of members? Perhaps you have parents who volunteer to help out with VBS. Now you can create a special discount link to share with them. When they go to the link, the discount will be automatically applied.
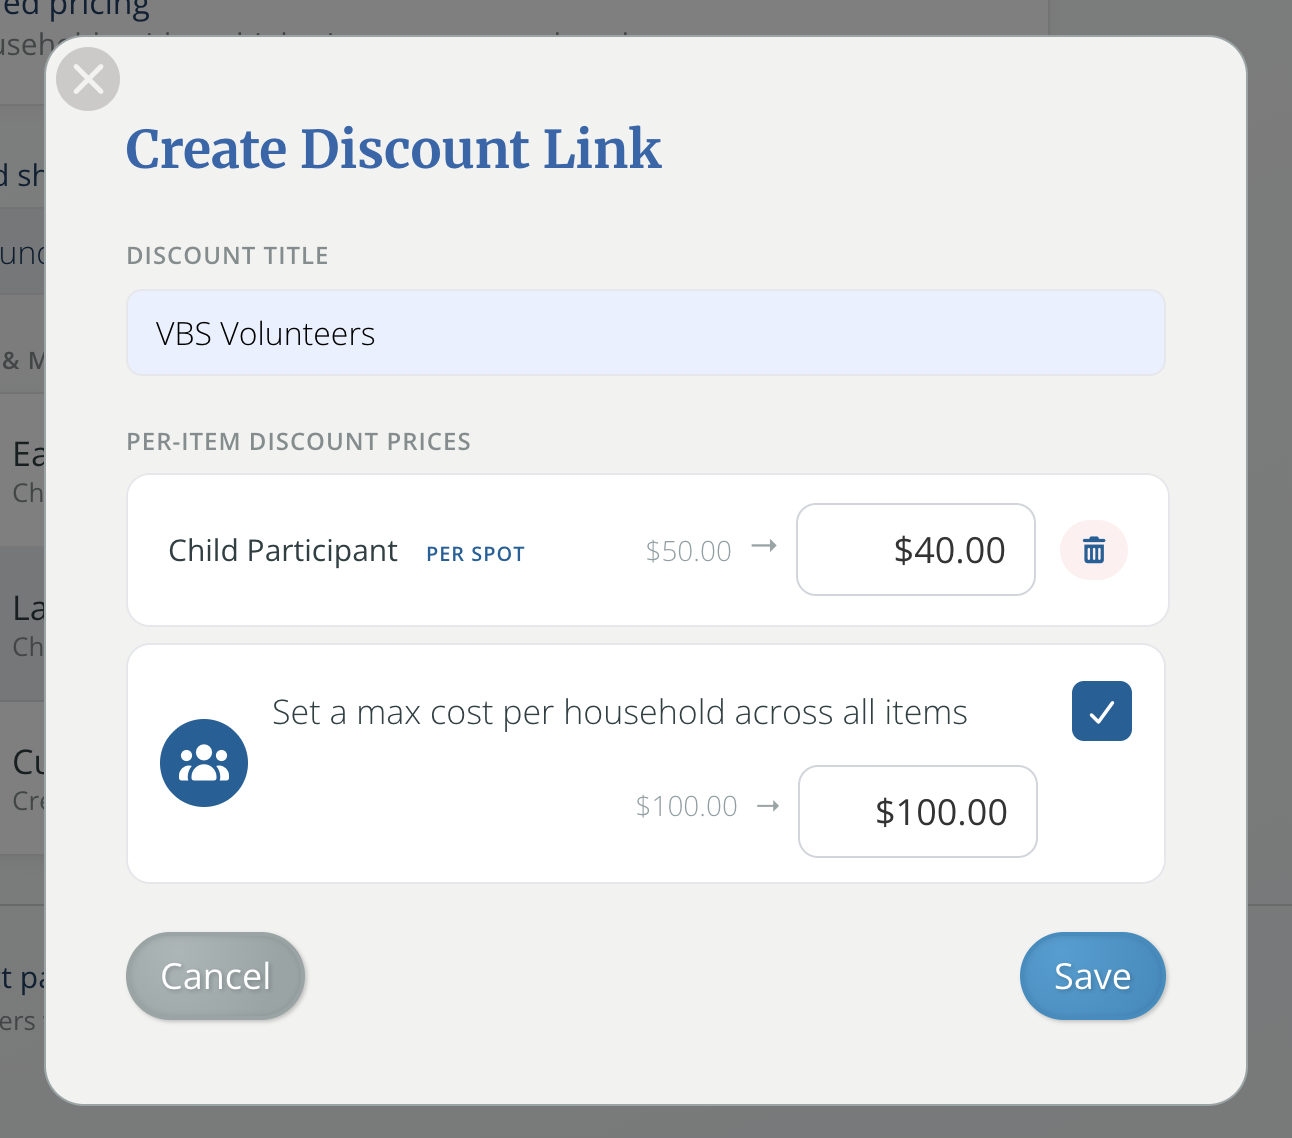
Set the name for the discount and add the different pricing you'd like those members to have access to when they receive that link:
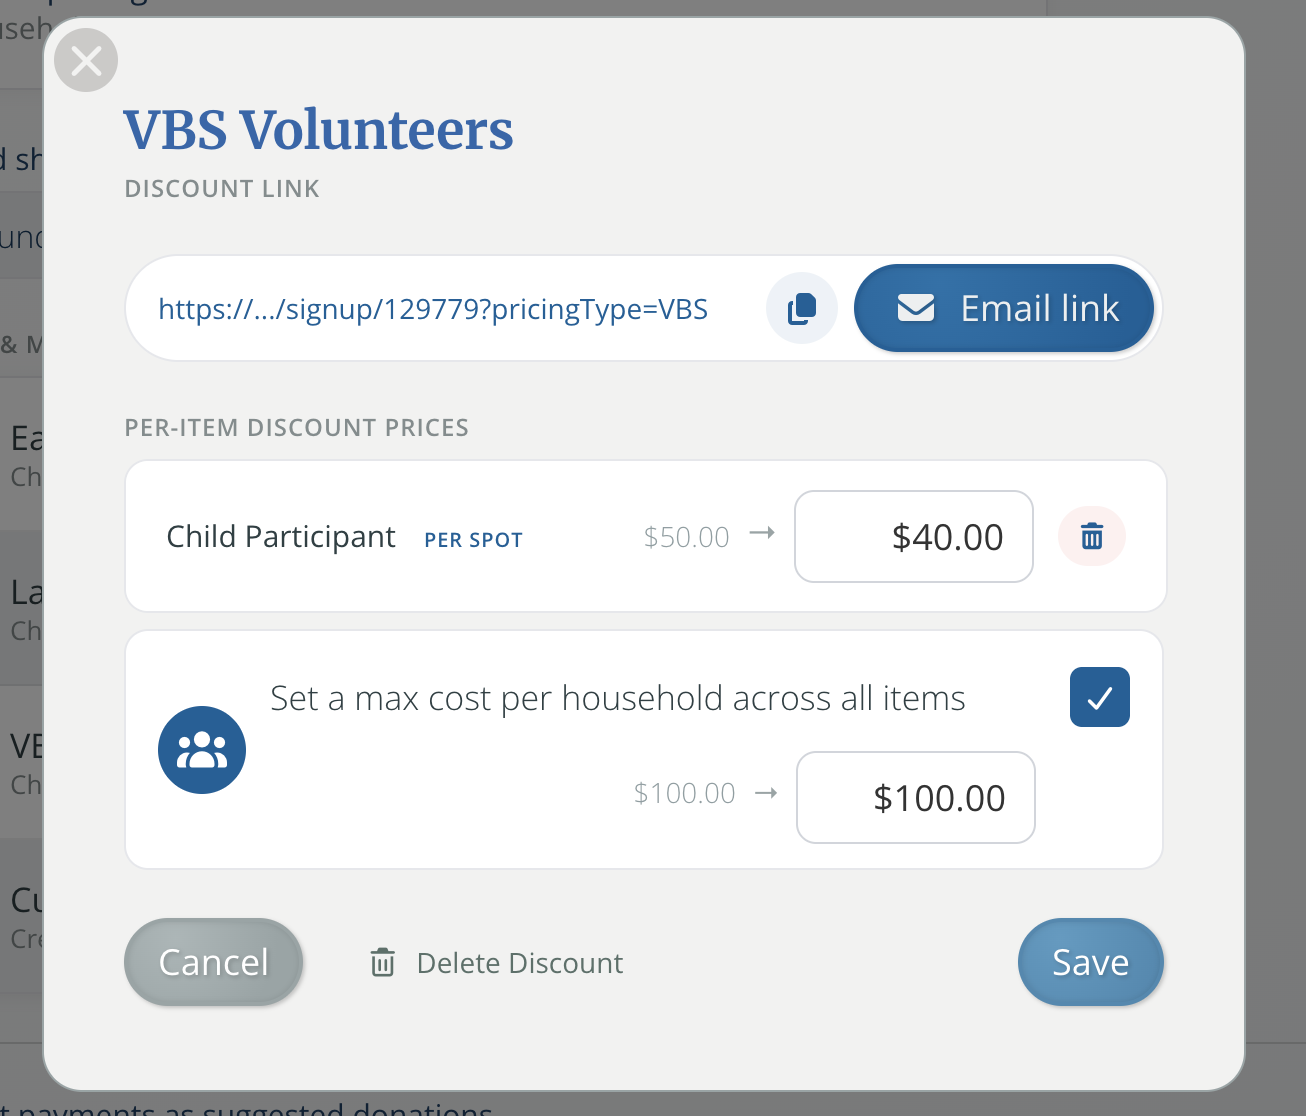
The link will be generated, where you can email it out or copy and paste it somewhere else.
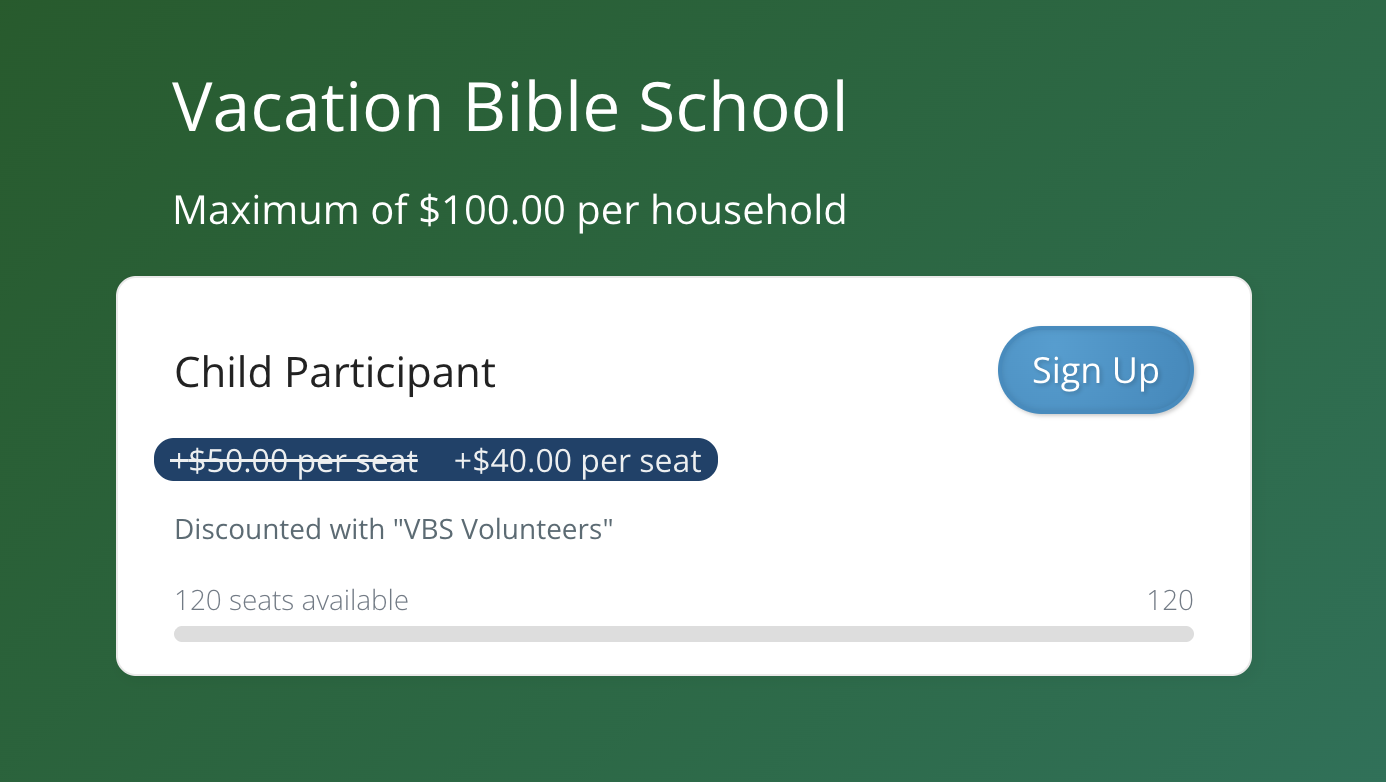
When members click on that link, they'll see the discounted pricing.
What will my members see?
When opening up a Signup from a Flocknote email/text or by visiting the Signup's unique URL, members will see each item along with the designated fees.
-
Sign up for spot(s) - As with any Signup, members will simply select the item(s) they want to sign up for, add others with them if applicable, and then click the green Sign Me Up / Sign Us Up button to submit their selection.

- Make a payment - Once your members have reserved their item(s), a total of the amount owed will appear in the top right-hand corner of the page with a green Pay Now button to make their payment. If a member does not click the green button and complete their payment at this time, they will still be signed up for their selected item(s), but they will be listed as unpaid when admins view the list of respondents. They can return to the Signup at any time to make their payment.


-
Receive confirmation - Once they have completed the payment process they will see a confirmation page (example below). This will include the total amount paid and a button to review their Signup. A receipt will also be sent to the member's email or phone number on file.


Tracking respondents and payments
Admins can easily track respondents and payments by returning to the Signup page. On your Flocknote network, click Signups in the dark, lefthand menu, then click the name of the Signup you are looking for.
- Click the Items tab
- Select the item that you would like to see the respondents for.
- Click the Respondents tab in the far right column.
- If a member made a payment along with their sign-up, PAID will appear next to their name.
- Any members that have not yet made their payment will be marked NOT PAID.

Payments made through Signups also appear in the Giving tab of a member's profile.

Payment Reminders
Ensure that members make necessary payments by sending out a friendly reminder to those who have signed up but have not made a payment just yet!
- Select the Signup Options Tab.
- Click the Send payment reminders now button.
- Finally, click the Send Reminders button to send an automated reminder to all unpaid members.

Feel free to use this button as many times as needed! Each time, a fresh reminder will be sent to anyone who hasn't paid. A record will also be kept beneath the reminder button, letting you know when previous reminders were sent and by whom.

The reminders will look something like this:

Removing Respondents and Refunding Payments
If you need to remove a member from a Signup item, simply click the small trashcan icon next to their name.

If the member you would like to remove paid for the item through your Signup, you will have the option to refund their payment. Click the green button to remove them and refund their payment or click the red button to remove them without a refund.

How to record payments made outside your Signup
If a member signs up but makes a payment outside of Flocknote (perhaps by bringing cash to the church office) you can mark them as paid manually. Click the "Not Paid" label to update it. Click Yes and the green "Paid" label will now appear next to that respondent's name!

If you have any questions about how to start collecting money with Signups, please reach out to us at help@flocknote.com – we are always here to help 😃