How do I use the Reports feature?
Flocknote Complete
This guide showcases features available only for those subscribed to our All-in-One software solution: Flocknote Complete. If you would like to learn more about these exciting features, click HERE. 🎉
Whether you’re tracking important ministry requirements, finding gaps in member data, or planning your next event, Reports allow you to quickly compile data already in Flocknote. This allows you to get the information you need and quickly take action on it!
In this Article:
Need inspiration? Check out some common use cases for Reports HERE!
Report Types
There are two types of Reports on your Flocknote network. Read on to learn more about these time-saving tools!
Network Reports:
To start, Network Reports live under the Ministry Tools tab on the left-hand side panel of your Flocknote network. Select Report Builder to access them. Network Reports can combine member data from various groups, or they can track data for all the members on your network at once. Network Reports can be seen by all Super Admins and any Group Admins that have admin access in all of the groups looped onto the Report.
Report Templates
To make things easier, we've included a few templates for Network-wide reports. Click on one of the Template titles to start tracking that info for your church community!

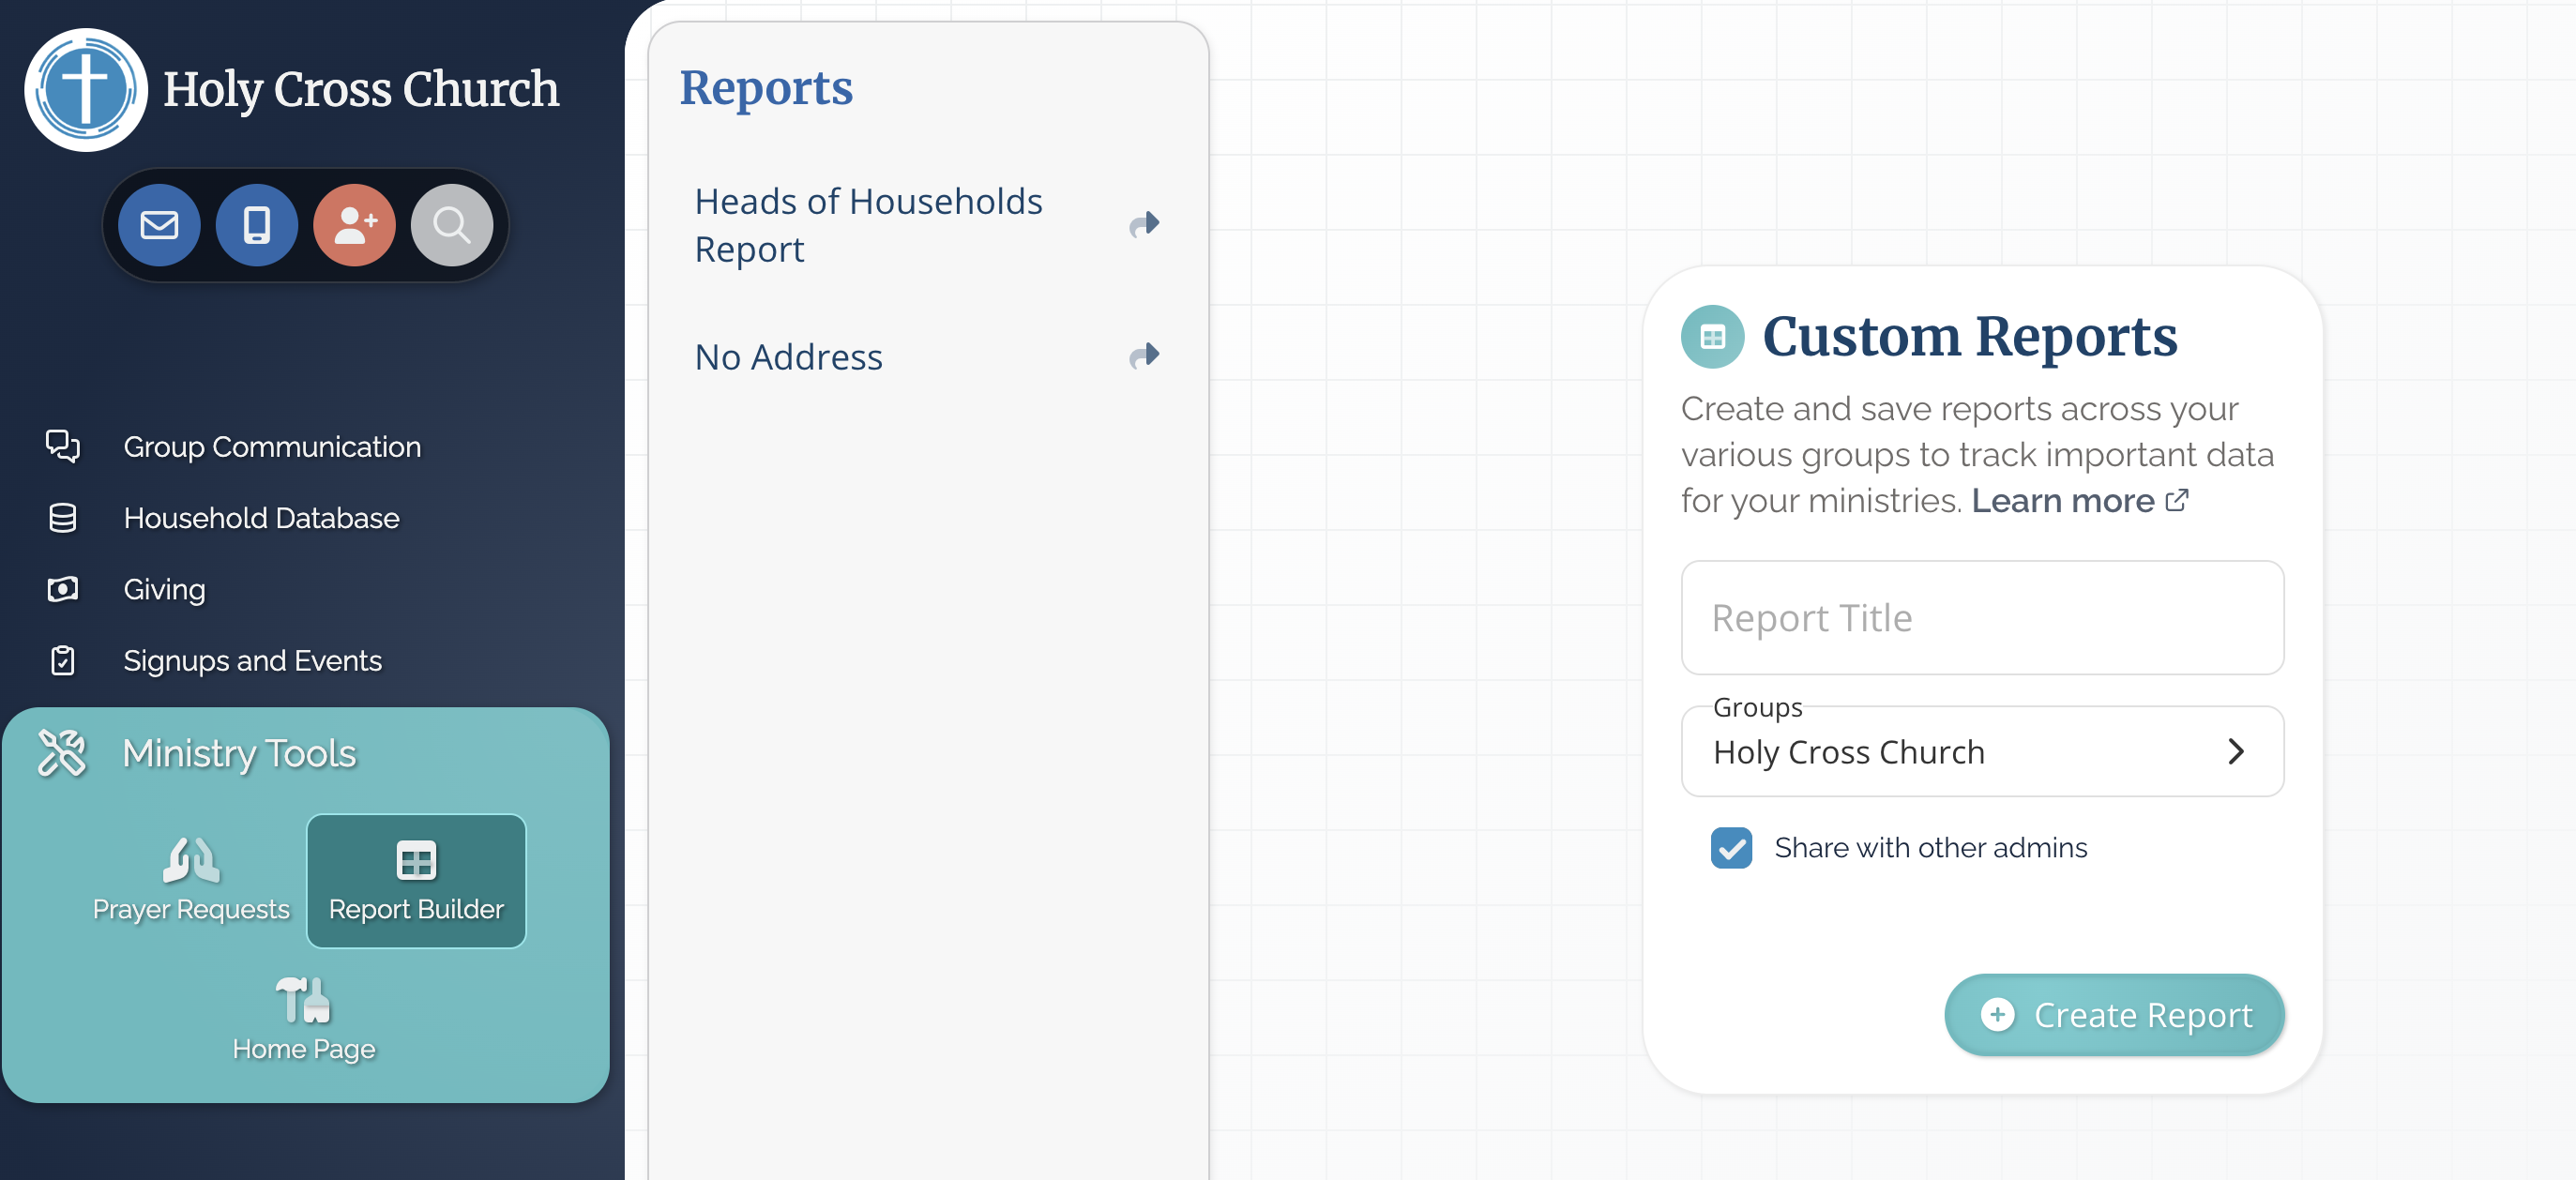
If you are looking to track a different data set, click the blue Create a new Report button to begin customizing a Report instead! This will take you to our Reports Generator:

- Title: Get the ball rolling by giving your Report a title.
- Groups: Select the groups whose members you would like to pull into this Report. You can select as many groups as you'd like!
- Access: Decide who needs to see this report. All Super Admins can see Network Reports by default. The Share with other admins box applies to your Group admin's access. If you leave this box checked, Group admins who are an admin for every group looped onto the report will be able to see and edit it.
- Create: Once everything is in tip-top shape. Click Create Report!
Group Reports
Group Reports live inside a group. Group Reports can be seen by all Super Admins and the Group Admins for the group the Report lives in. For a more detailed guide on group reports, check out this guide: How to use Reports in a group
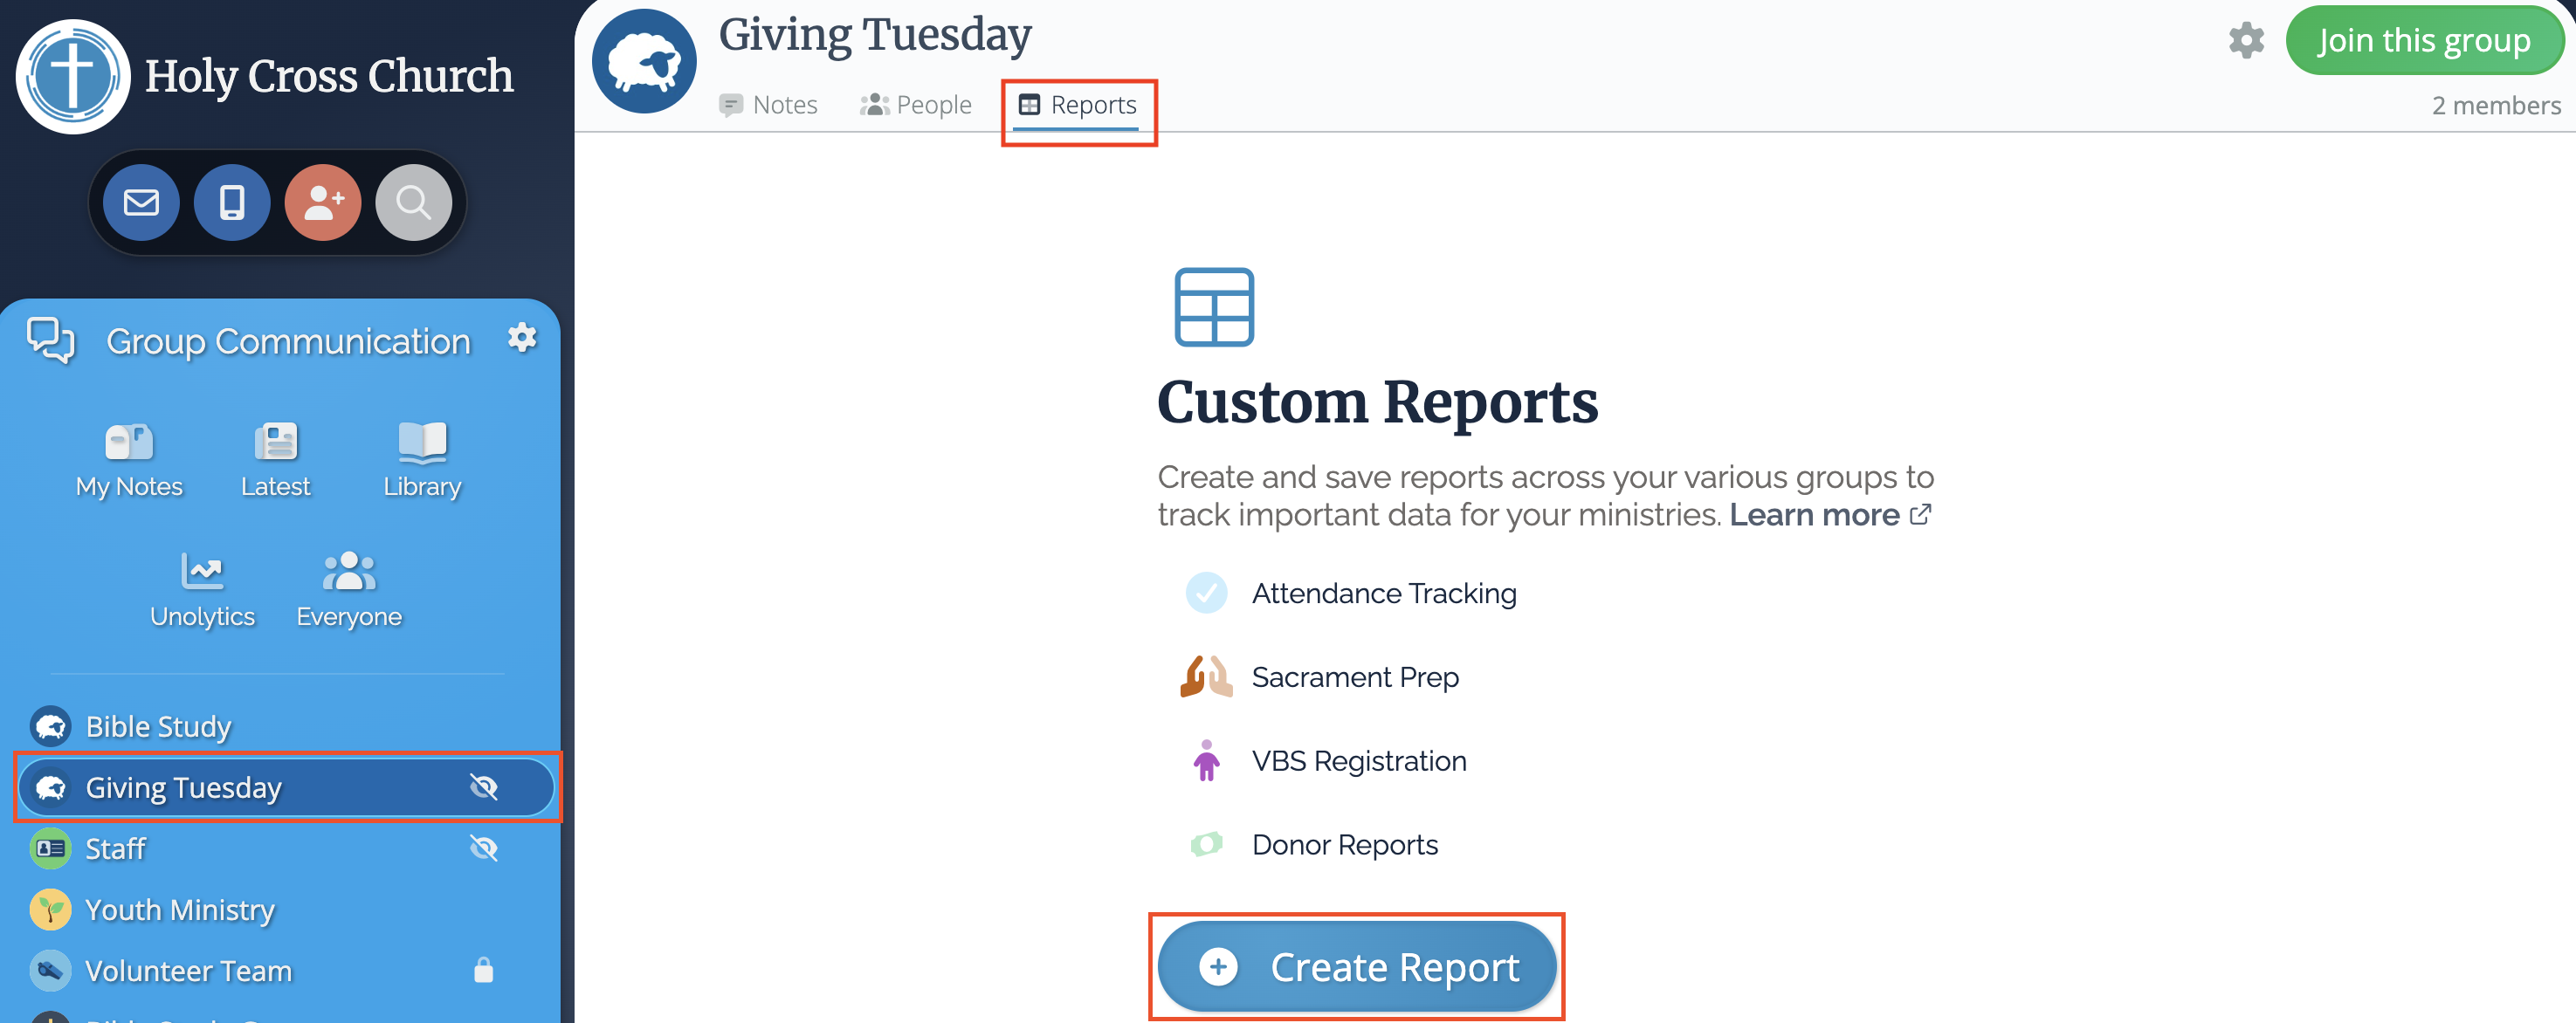
To start a Group Report, select one of your groups by going to Group Communication from the left-hand sidebar, click on the group you'd like a report for, and click on the Reports tab. If it's your first time creating a Report within this group, you'll click the blue + Create Report button. If you've already created a Report within a group, you can just hover over the (+) icon, and you can click the + New Report button.

Building your Report
Default columns
All reports have 3 default columns to help you get started: Checklist, Text, and Number Columns.

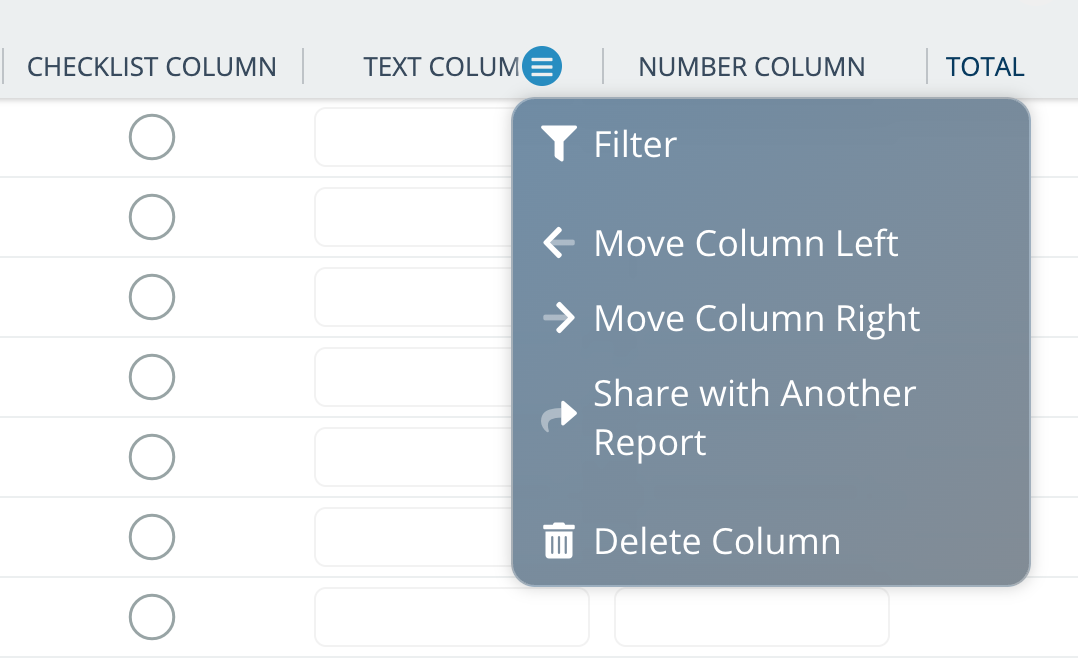
You can rename these columns by clicking the text at the top of the column, or you can remove them by hovering over the name until the three horizontal lines appear. When you click on those three lines, you'll see some options appear in the drop-down:
- Filtering on the column: More on that here
- Options to move the column left and right
- Sharing a column with another report: This option is reserved for Super Admins and Group Admins who are sharing the column with another report for a group for which they're an admin
- Deleting the column
Add additional columns
Adding a new column only takes a few clicks! Start by clicking the plus sign (+) next to any existing column.

Reports are powerful and can pull together data from all over Flocknote, so you have several choices when it comes to adding additional columns.

- New: This option allows you to add another of the default column types. The information added to the checklist, text, or number column will exist only in this Report (unless shared).
- Existing: This option allows you to pull in an existing column from another Report. Simply select the group, the name of the other Report, and the name of the specific column to pull that information into your new Report. The information inside an existing column is dynamic. This means information in these columns can be updated on the new or the original Report, and it will be updated in all places the column is shared.

- Profile Field: This option lets you pull info from your custom profile fields onto your Report. The data in these fields is also dynamic, meaning any information updated for these fields (inside the Report) will update on your members' profiles as well - making record keeping easier than ever!

Filter your data
After adding your columns, you can use the Filter feature to narrow down the results that appear on your Report. For example, filters can help you see who in your Religious Education class has paid their registration fee or see who attended the last class. They can even help you see things like which donors need to update their email for tax season!
Let's take a look! There are two ways to filter...
Filter the entire report
Select Add a Filter in the top right-hand corner. A menu will appear with different criteria for you to filter for with these members. These are the building blocks of your report! To learn the basics of filtering, click HERE.
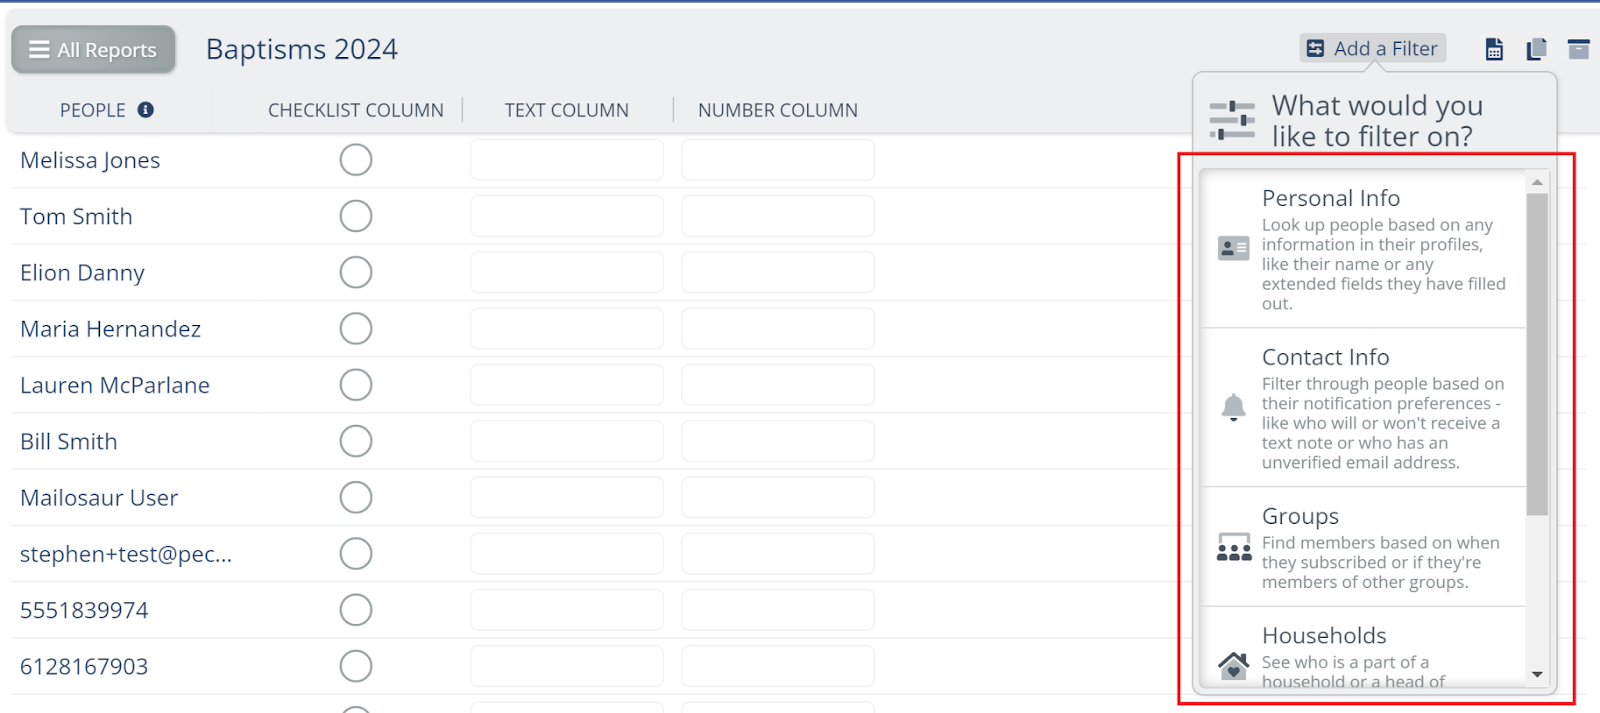
In this particular use case, we’ve selected Personal Info > Baptism Date > Date is after January 1st, 2024. This will generate a list of all members who were baptized within the past year.

Note: Once I ran my filter, I tidied up the columns of the report. I’ve renamed my first column Added to Registry to keep track of Baptisms this year that have been added to the Church Registry. I went ahead and deleted the other columns to keep things simple.
To save this view, I'll select the Save icon next to the purple Filter icon. Now that the filter is saved, anytime I visit that Report I will see a list of members who have been baptized in 2024 and whether or not that baptism has been recorded in our registry book. 👏 This will save time and keep things organized moving forward.

Filter on a Column
To filter from a particular column, hover over the column title. When the three lines appear, click that icon to open the drop-down. Select the Filter option

Note: You can not filter directly from the column on a shared Signup Field or a profile field.
From there, you can narrow down your search! In this case, I want to see those who have a Sponsor name filled out for my Confirmation Prep Class.

Take Action!
It doesn’t stop there - now you can use that filtered information to take Action! You have the option to bulk select these members and click on the purple Actions button to:

- Add them to another group
- Remove them from that particular group (if you are working within a specific group and not in your Everyone group)
- Remove them from the network
- Email or text the members on the Report
Copy and Share your Report
No matter what project you have on your To-Do list, Report actions can help get your data in the right place! On the following Report actions, you share more data/more dynamically the lower you go on the list. Check out the list below for details.

- Copy Report Structure:
- What it does: This copies the existing column headers over to a new Report
- Use it for... A great use case for the Copy Report Structure function is attendance! Save time by creating checklist columns for each day you have a class, and then copy that structure to other grade levels or classes.
- Copy Report Structure & Data
- What it does: Not only does this copy the report structure (current column headers), it also brings over any existing Report field data.
- Use it for... use the Copy Report Structure and Data function to pass the existing report + data on to other volunteers/admins.
- Share the Report Columns
- What it does: All the existing columns + the data in those columns (reminder that these columns are dynamic).
- Use it for... Safe Environment or other "requirement-heavy" projects are a cinch with the Share Report Columns feature
- Share the Entire Report
- What it does: This creates an exact/dynamic copy of the report. Any edits made on one report will be made on the other.
- Use it for... Make copies of existing reports and share them with other admins. Teamwork makes the dream work!
Reports can supercharge information within your network so that you have the right tools to connect with members.
Here are a few more use cases for Reports:
- A running report of all Admins on your network
- Members who have not joined any groups (outside of Everyone).
- An envelope number report with the envelope number and address field, plus a custom field to track who receives or no longer wants to receive envelopes. An easy report to share with your envelope company.
- View members who have filled out their membership status or see all registered members at once.
- Running reports of current and recurring donors, members who have given in the last month, quarter, year, etc.
- Reports for those who haven’t uploaded important files (Baptismal Certificates, Permission Slips, etc) for Religious Education or Youth Ministry.